
Adding Calendar and Contacts on Android
Syncing Contacts, Calendars, Tasks and Journal on Android
ThisServices: guideTranquil takesIT BookDAV, DAVx5, and jtx Board
Installation Source: F-Droid (Open Source)
Credentials Source: 1Password
1. Setting up F-Droid (The App Store)
F-Droid is an independent app store for free and open-source software. Since it isn't the Google Play Store, you throughneed addingto "sideload" it once.
-
Open your mobile browser (Chrome, Firefox, etc.) and go to f-droid.org.
-
Tap the
sharedDownloadCalendarF-Droid button. -
Once the download is complete, tap the file in your notification bar to install it.
-
Security Prompt: Android may say "For your security, your phone is not allowed to install unknown apps from this source."
-
Tap Settings on that pop-up.
-
Toggle the switch for
TranquilAllowCirrusfromsitethis(STN1) as well as the Tranquil Shared Contactssource. -
Go back and tap Install.
-
-
Open the
contactsF-DroidApp.app.Choose-
Note: It may take a minute to "Update repositories" on the first launch. Wait until the progress bar at the top finishes.
Contacts -
2. Install the Required Apps
Search for and theninstall selectthese Addtwo Account.apps within F-Droid:
-
SelectDAVx5:otherThis handles the background sync for your contactsaccount
and calendars. -

3. Pre-Flight Check: 1Password
Ensure your 1Password app is logged in on your phone.
-
Pro Tip: Enable Autofill in your phone's Settings > Languages & Input > Autofill Service > 1Password.
4. Configure the Connection (DAVx5)
-
Open DAVx5.
-
Permissions: Grant all requested permissions for Contacts, Calendars, and Notifications.
-
Tap the (+) icon (bottom right) > Select "Login with URL and user name".
-
Enter the
followingfollowing:into-
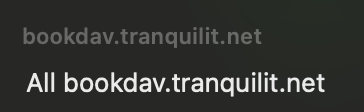
Base URL:
https://bookdav.tranquilit.net -
User name: Tap the
fields.fieldTheandpassworduse the 1Password prompt to fill your credentials.
-
-
Tap Login.
-
Account Name: Set this to Tranquil IT.
-
Select Your Data:
-
CARDDAV tab: Check your Address Book.
-
CALDAV tab: Check your Calendars AND any Task/Journal lists.
-
-
Tap the Sync icon (bottom right).
5. Setting up Tasks & Journals (jtx Board)
Now that DAVx5 is availableconnected to the server, we need to tell jtx Board to display that data.
-
Open jtx Board.
-
Initial Setup: Follow the welcome prompts. When asked about a "Sync Source," choose DAVx5.
-
Permissions: Grant permission to access your "Calendars" (this is where Tasks and Journals are technically stored).
-
Link the Account: * In the jtx Board settings/sidebar, ensure your Tranquil IT account is active.
-
Your tasks and journal entries will now sync automatically between your phone and the server.
-
6. Prevent Sync Issues (Battery Settings)
Android will stop these apps from syncing if they are "optimized."
-
Go to Settings > Apps > DAVx5.
-
Tap Battery > Select Unrestricted.
-
Repeat these steps for the jtx Board app.
Where is my data?
-
Contacts: Found in your
1PasswordstandardaccountContactsunder:Radicale (CalDav CardDav TIS Server Booking)
This will add the account with a very stupid name
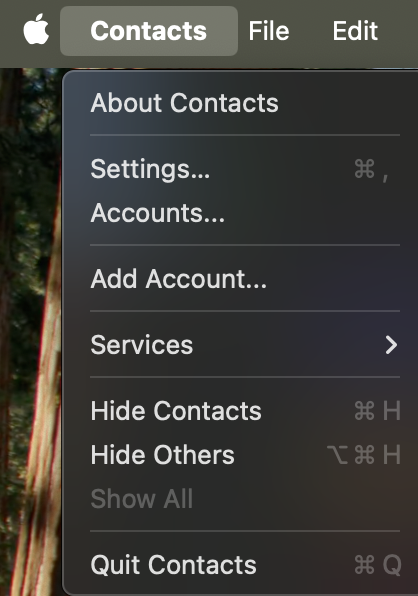
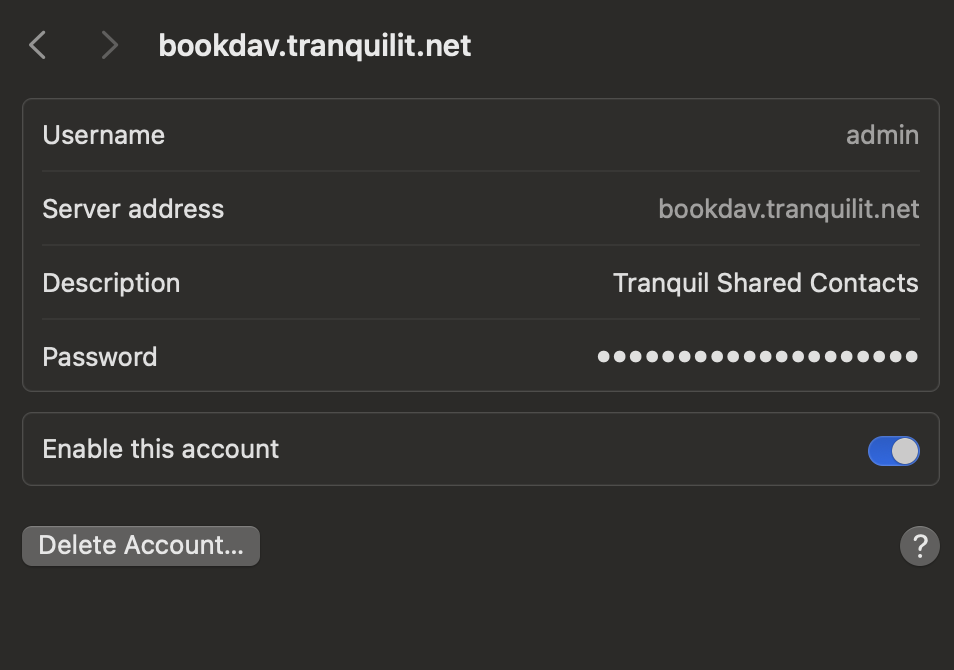
Lets call it something more recognisable.Go to contacts and select Accounts..app.
-
standardSelectCalendar:theFoundbookdavinaccountyour
Calendar
(ensure "Tranquil IT" is checked in theClickappdescriptionside menu). -
Tasks & Journals: Found inside the jtx Board app.


⚠️ IMPORTANT: When creating a new item, always ensure the "Account" or "Save to" field andis changeset to Tranquil IT. If it tosays Tranquil"Local" Sharedor Contacts
"Google," your colleagues will not see it!
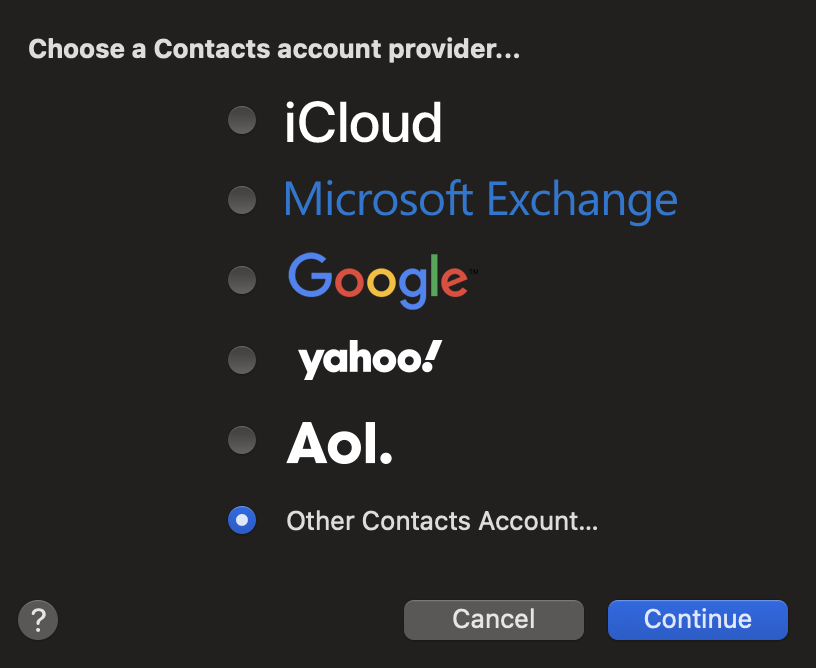
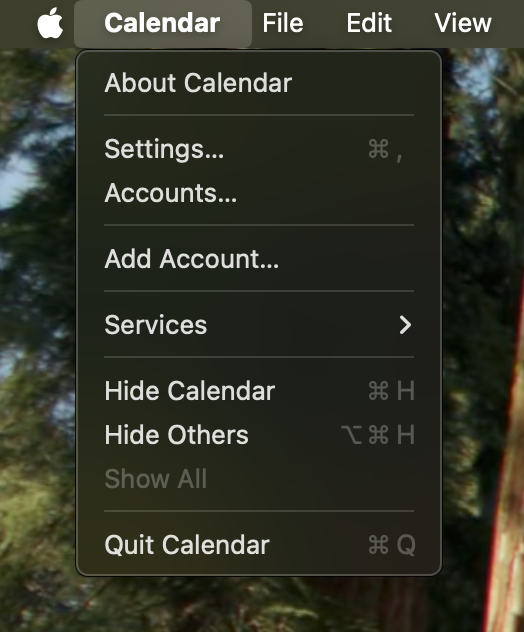
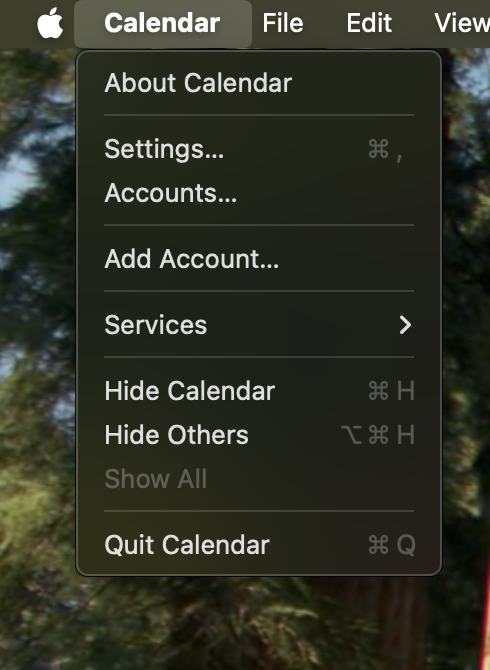
Thats the contacts list done. Now lets look at the shared Calendar. Open Calendar and choose Calendar -> Add Account...
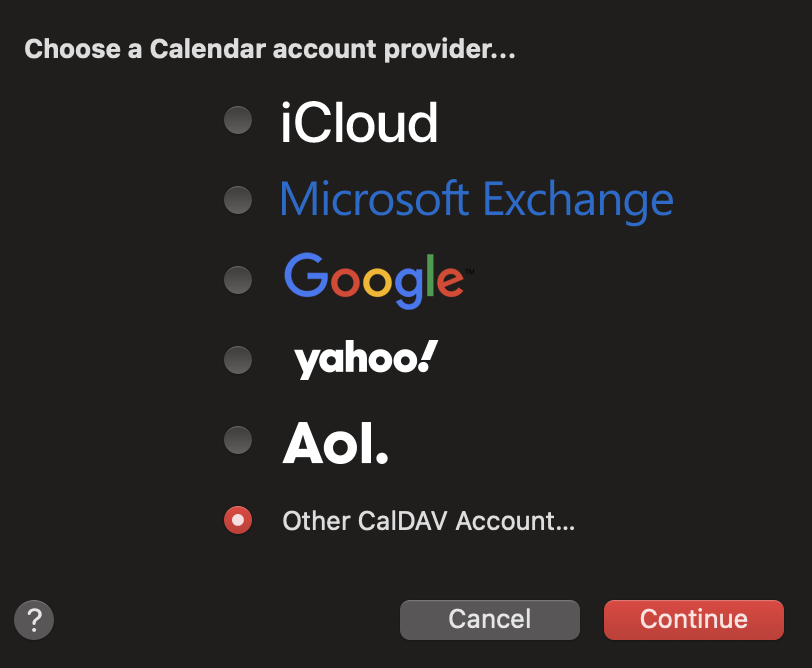
Choose other CalDav account.
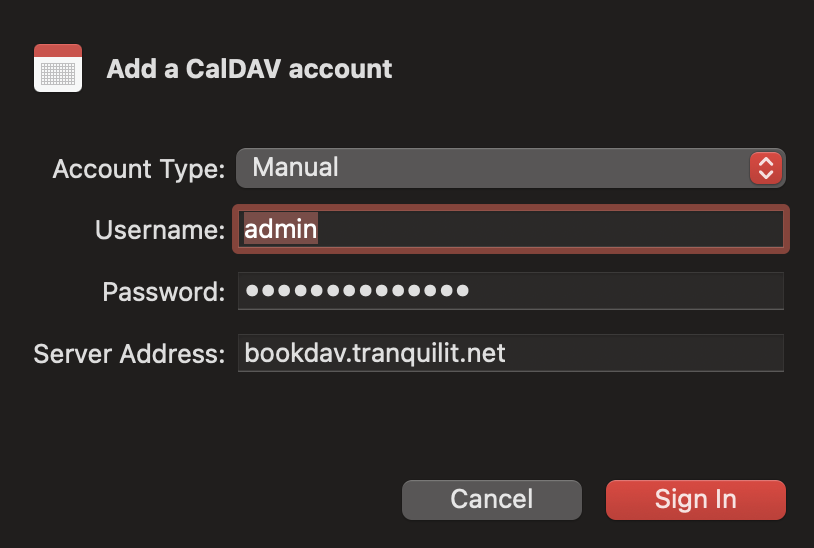
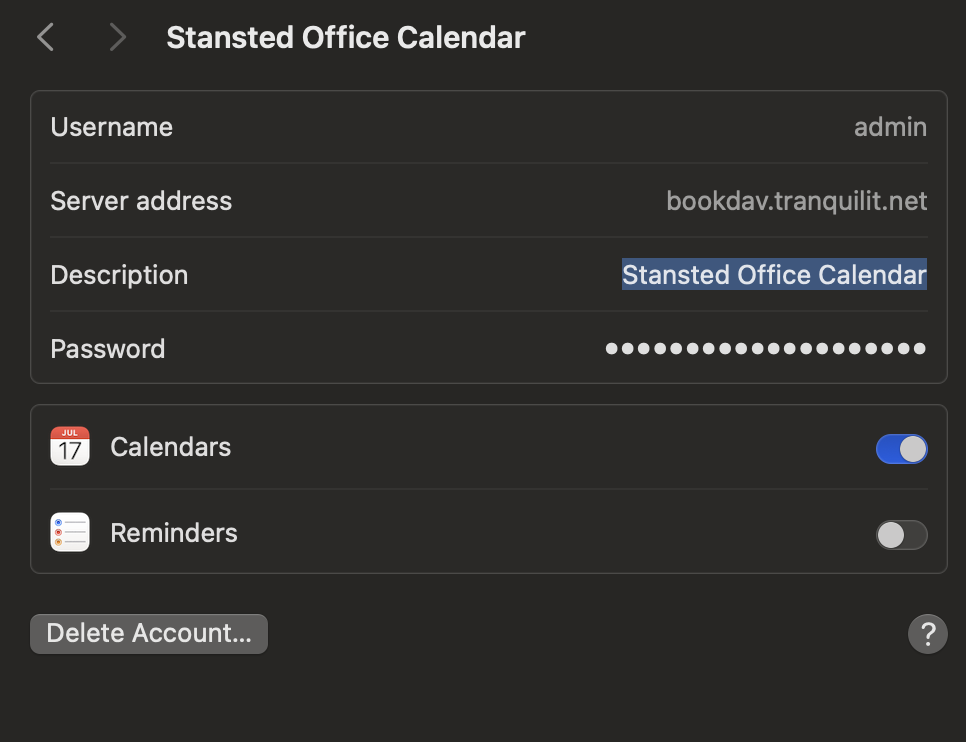
Enter the information below using the same password as you obtained above from 1Password.
Again once the calendar is added, it has a silly name. As before go to Calendar -> Accounts...
Click on the strangely named account and as before rename it to Stansted Office Calendar.
All done!