Sentinel - Client Area User Guide
Your Client Area user guide
Logging In
Logging in
Log in with your Tranquil IT or Cloud Account
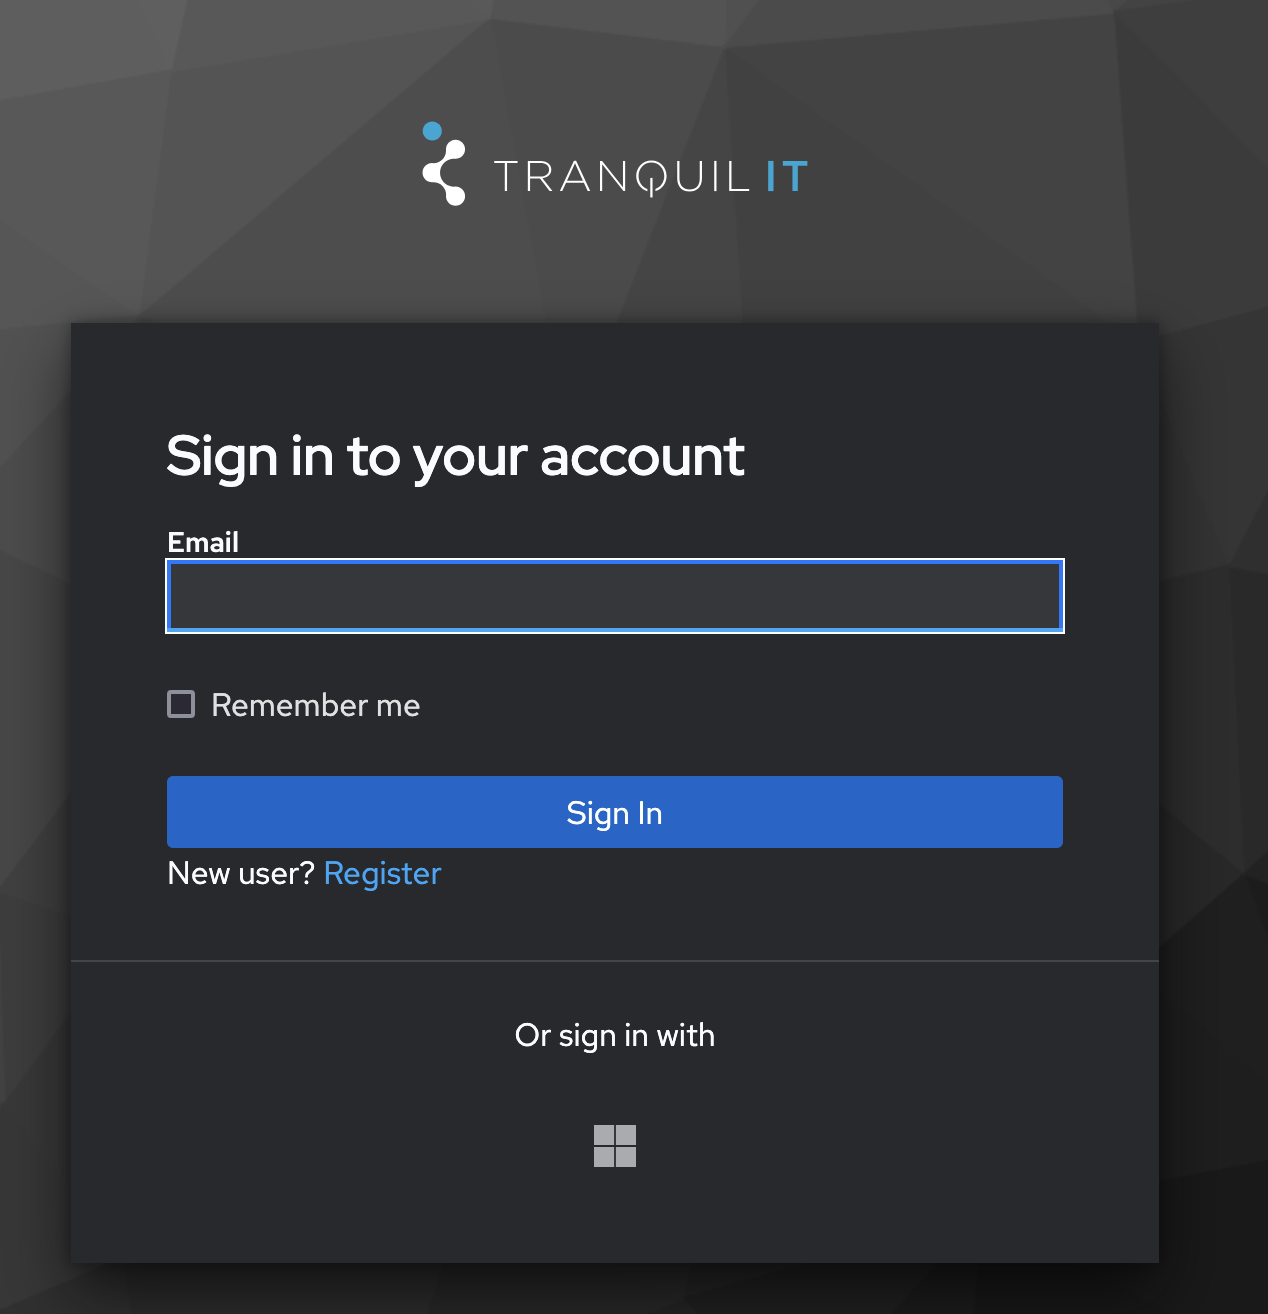
To access Sentinel, go to https://sentinel.tranquilit.cloud/ . You will be greeted with the following page.
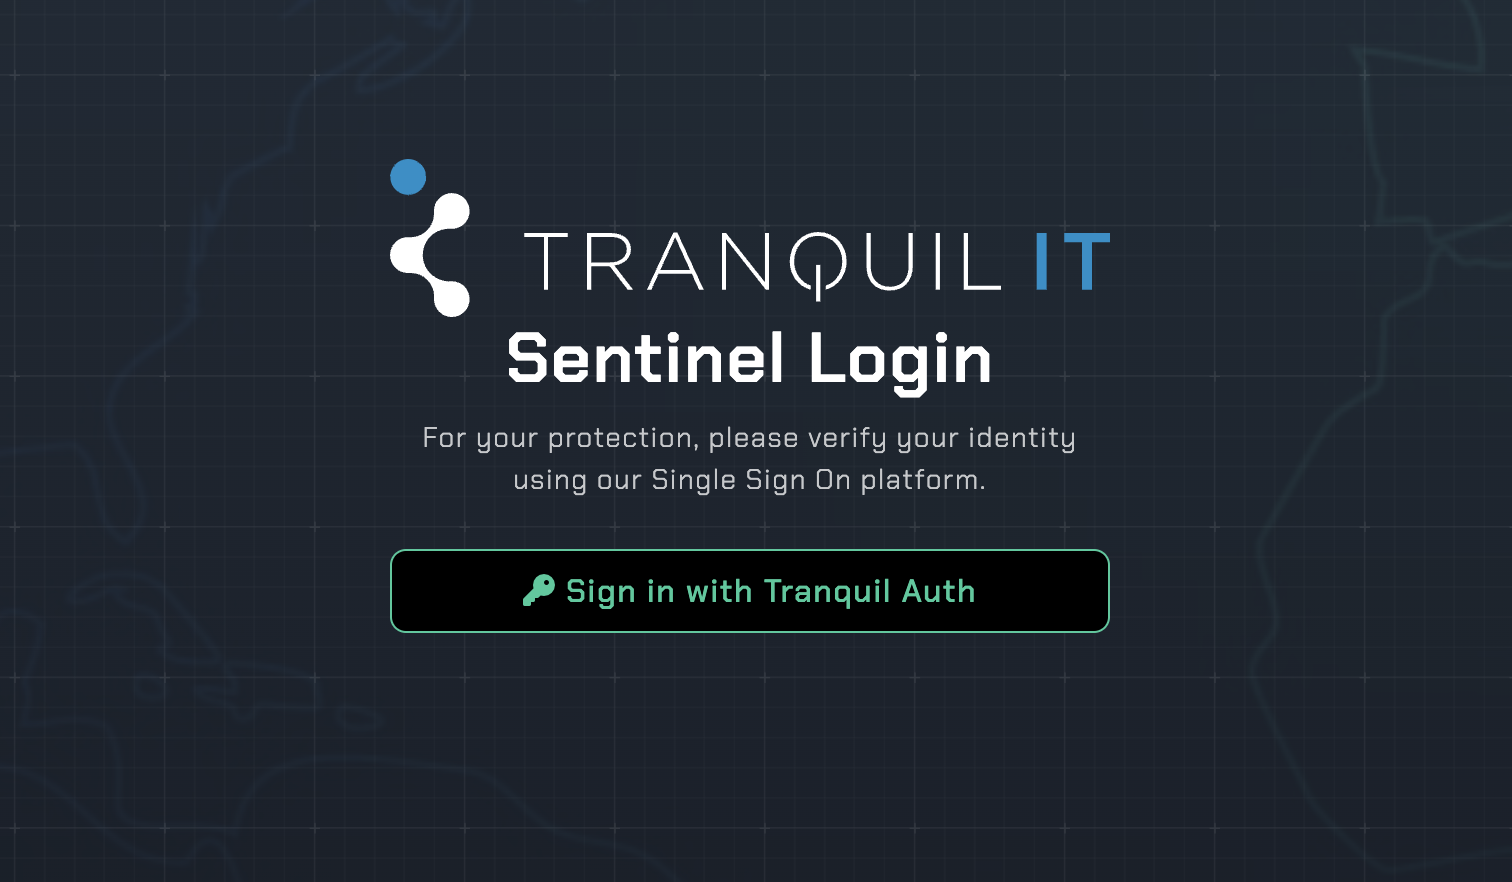
At Tranquil IT we use an SSO or Single Sign On solution for your security and convenience.
Click Sign in with Tranquil Auth to continue you will now be taken to our SSO server for authentication.
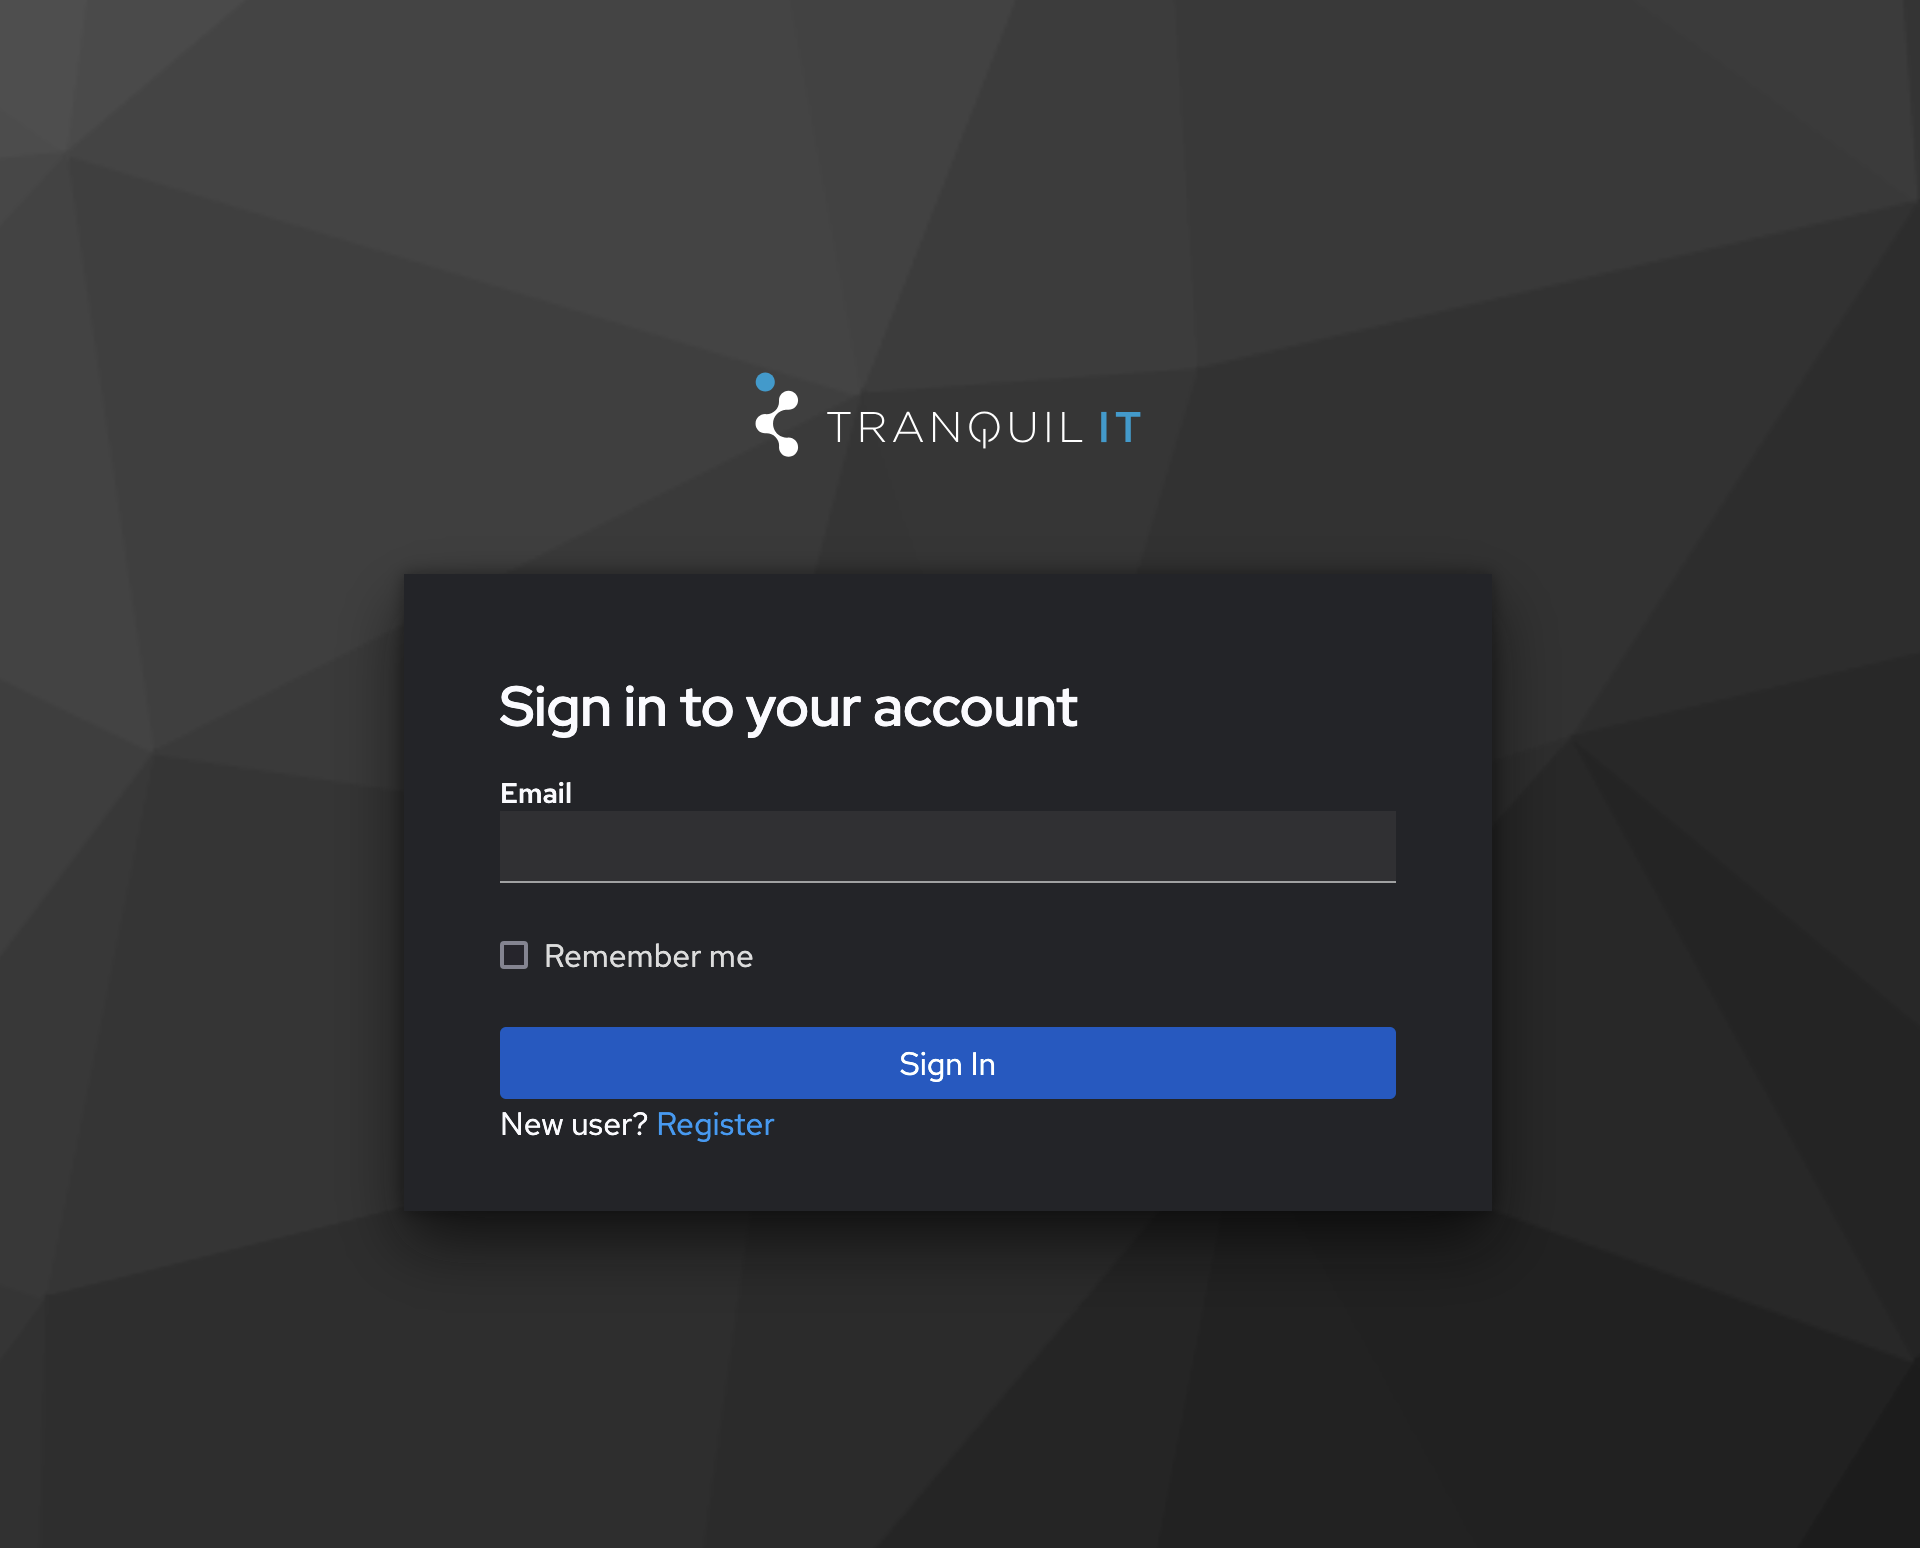
If you have a Cloud Account with us or a Microsoft 365 Account you are likely already enrolled with our SSO solution. Simply enter your e-mail and the password that you use to sign into these services to sign in. If you have not already set up Two Factor Authentication - 2FA you will now be prompted to do so.
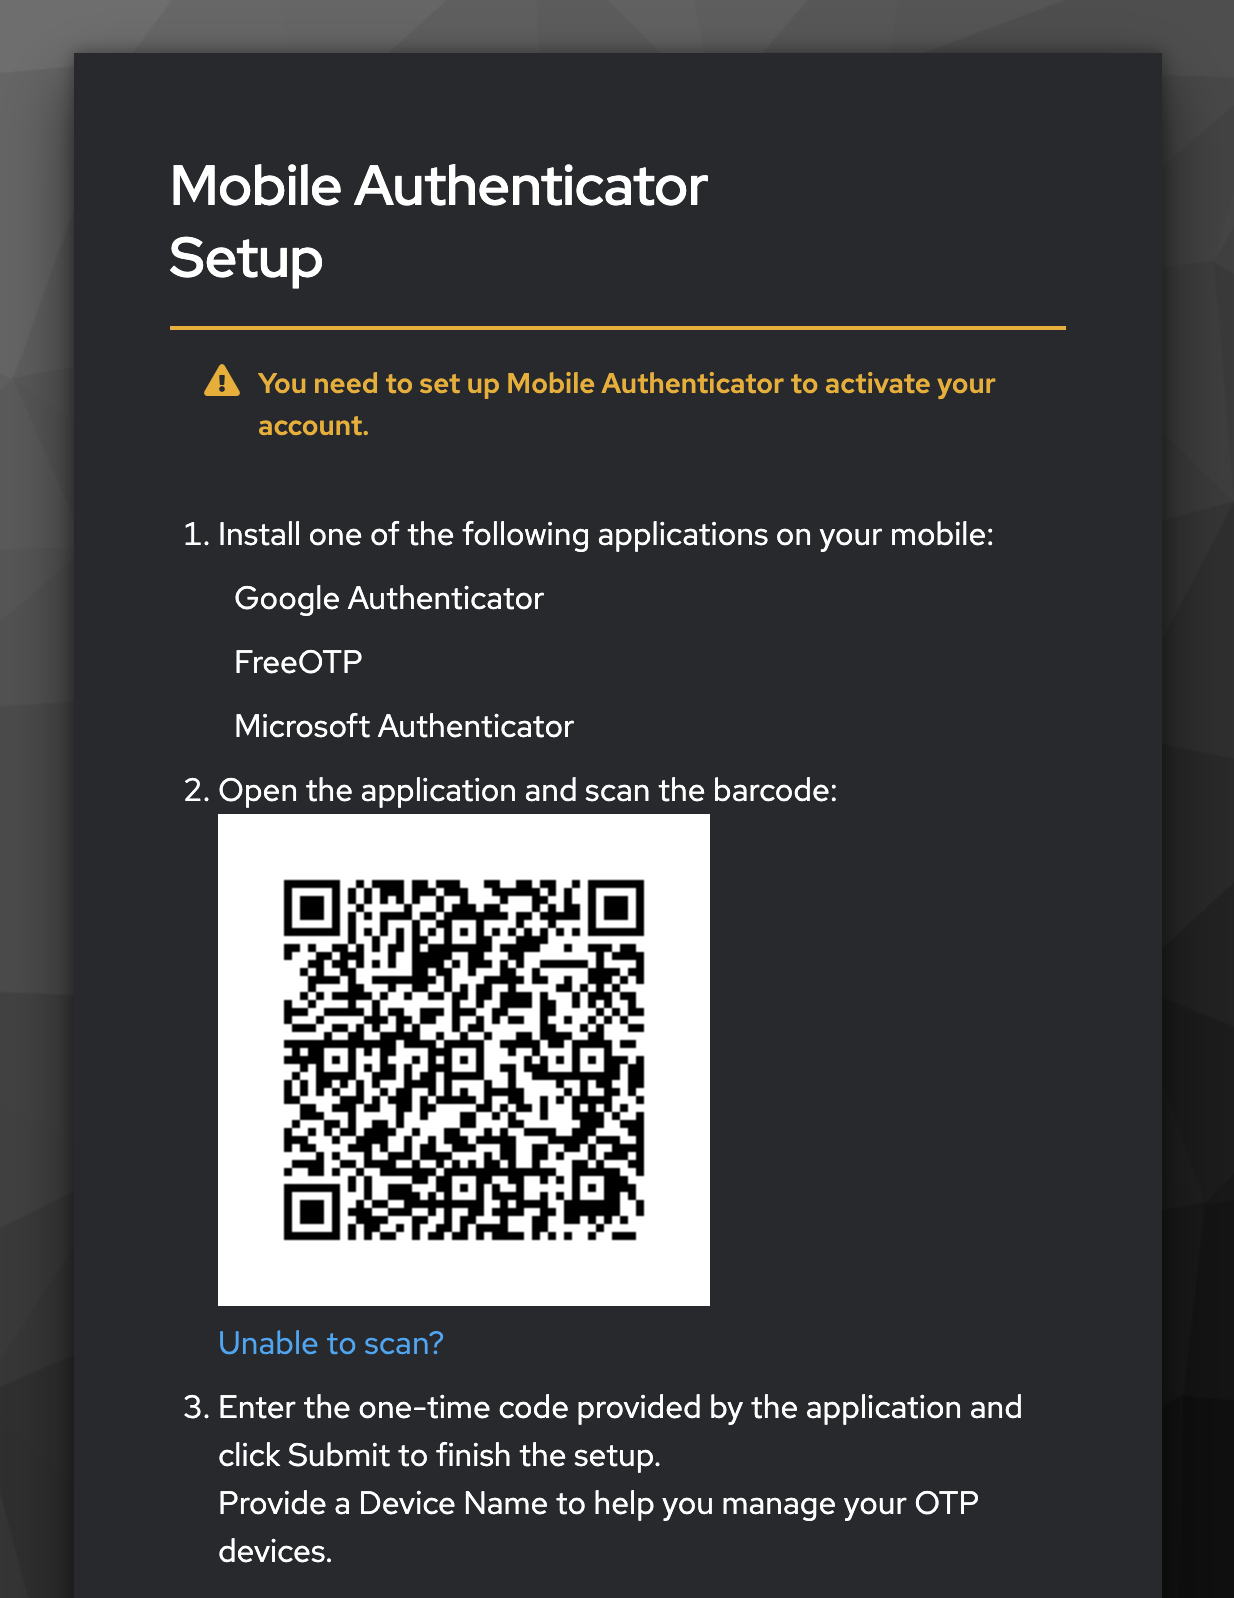
You will then be asked to complete Two factor Authentication (2FA) this will depend on the kind of 2FA solution you have chosen.
If you do not already have an account with us it is extremely easy to create one.
First, click on the Register button.
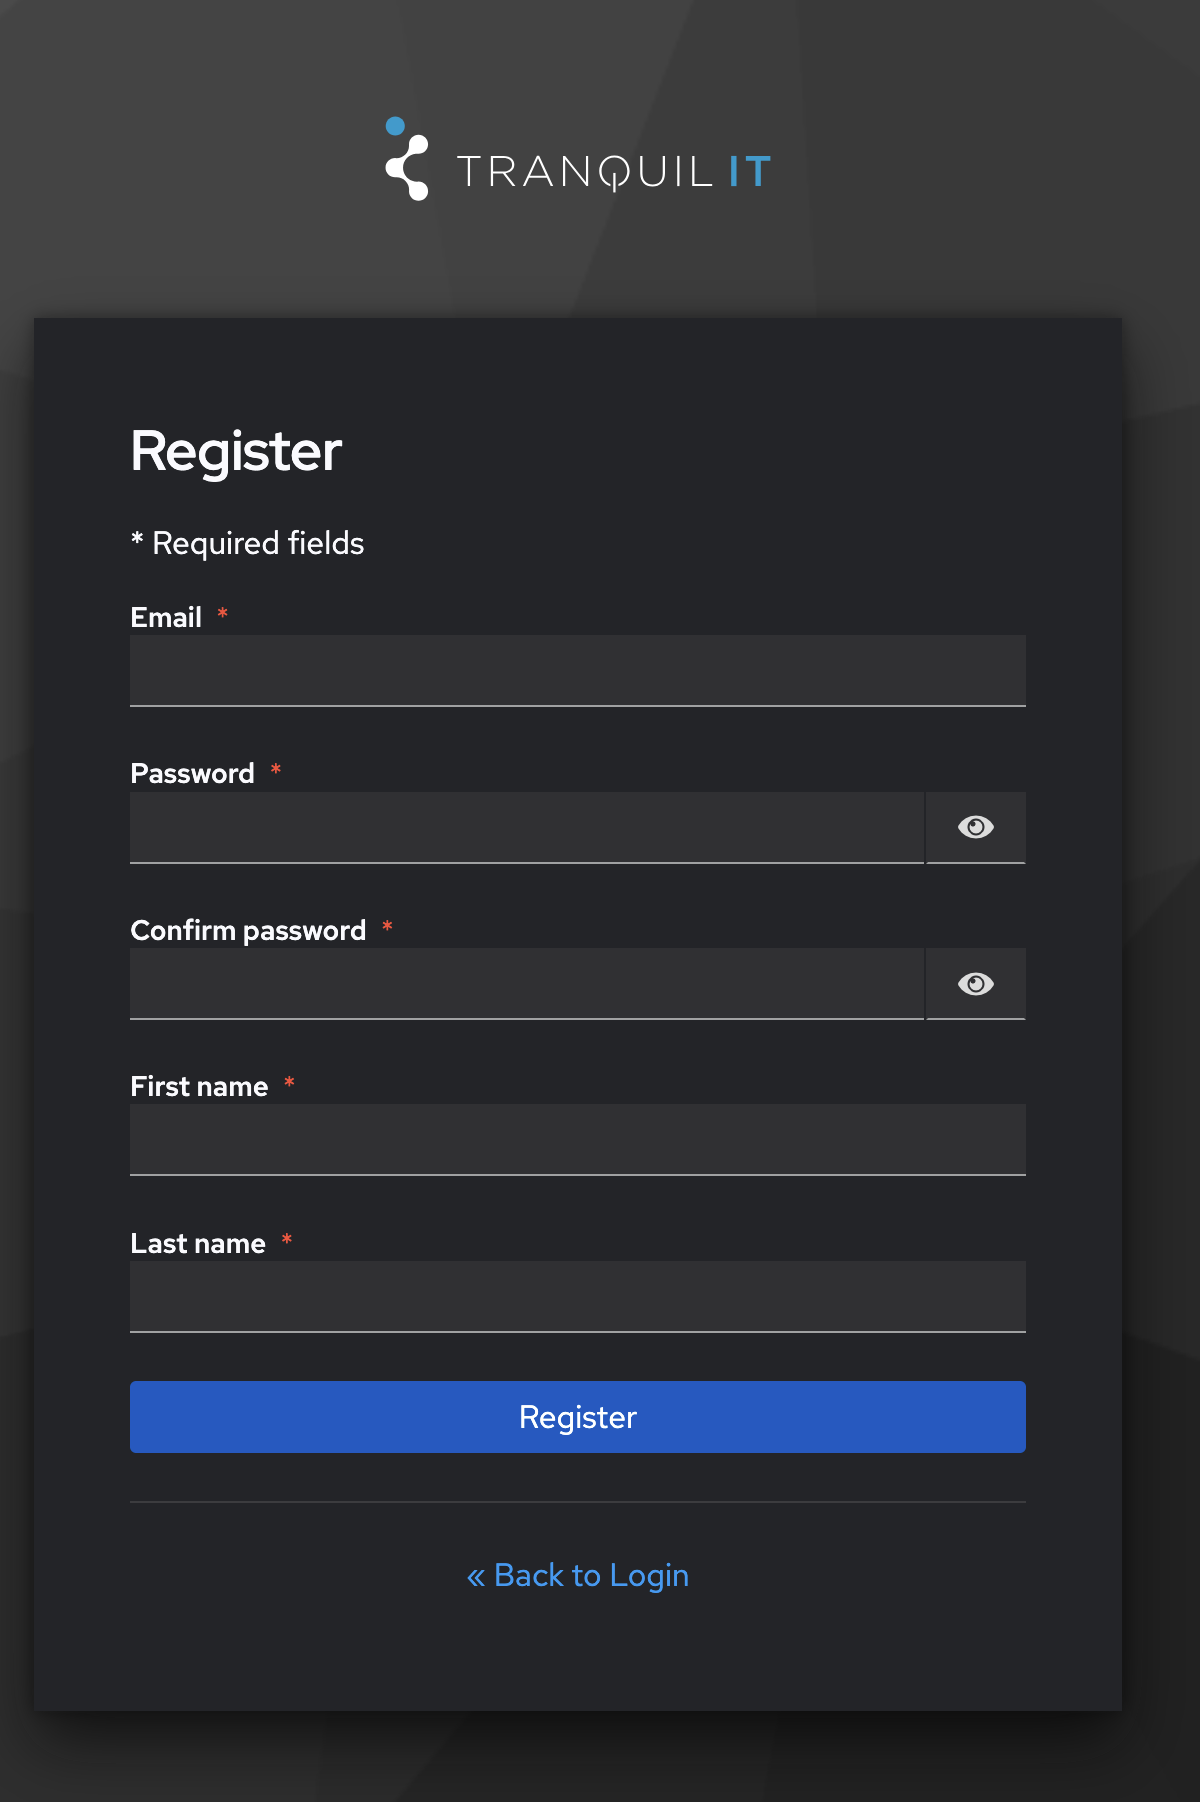
Now complete the form that you are presented with. Once you have registered your request will be sent to our Support team to allow them to link your user to your account with us. Once this has been completed you will receive an e-mail advising you that your account is ready for use.
If you receive the below error message
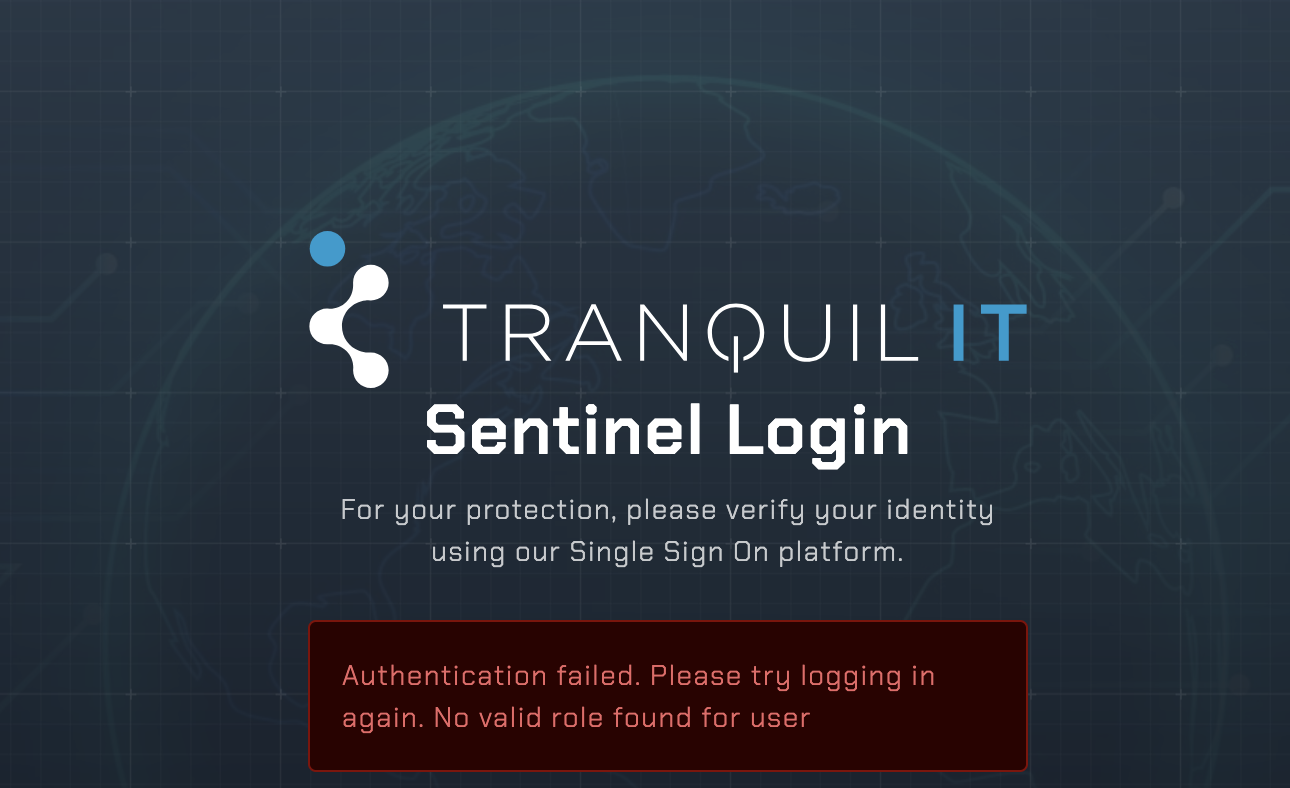
Then your organisation have not yet given you permission to log into your client area. Please contact your internal management or contact support, if you believe this to be in error.
Microsoft 365 Account
If you are subscribed to Microsoft 365 through Tranquil IT, you don't even need another login to access other Tranquil Services. This makes it even more secure and easier for you as you only need the one login for all accounts.
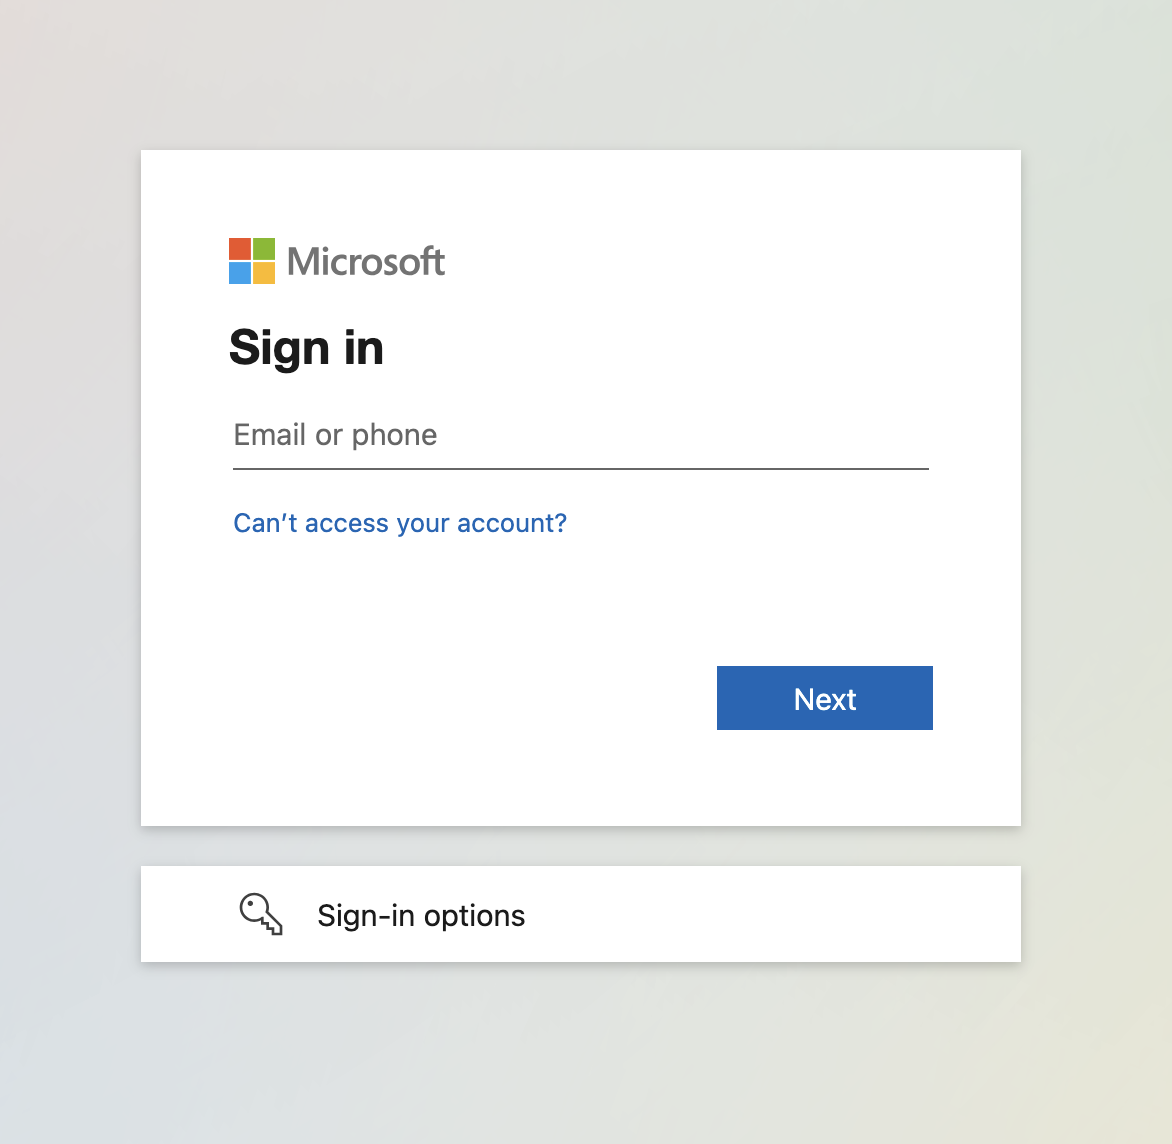
When presented with the Tranquil SSO login screen, click the Microsoft Logo under the 'Or sign in with' section.
You should now see the usual Microsoft login prompt, fill in your credentials like you normally would.
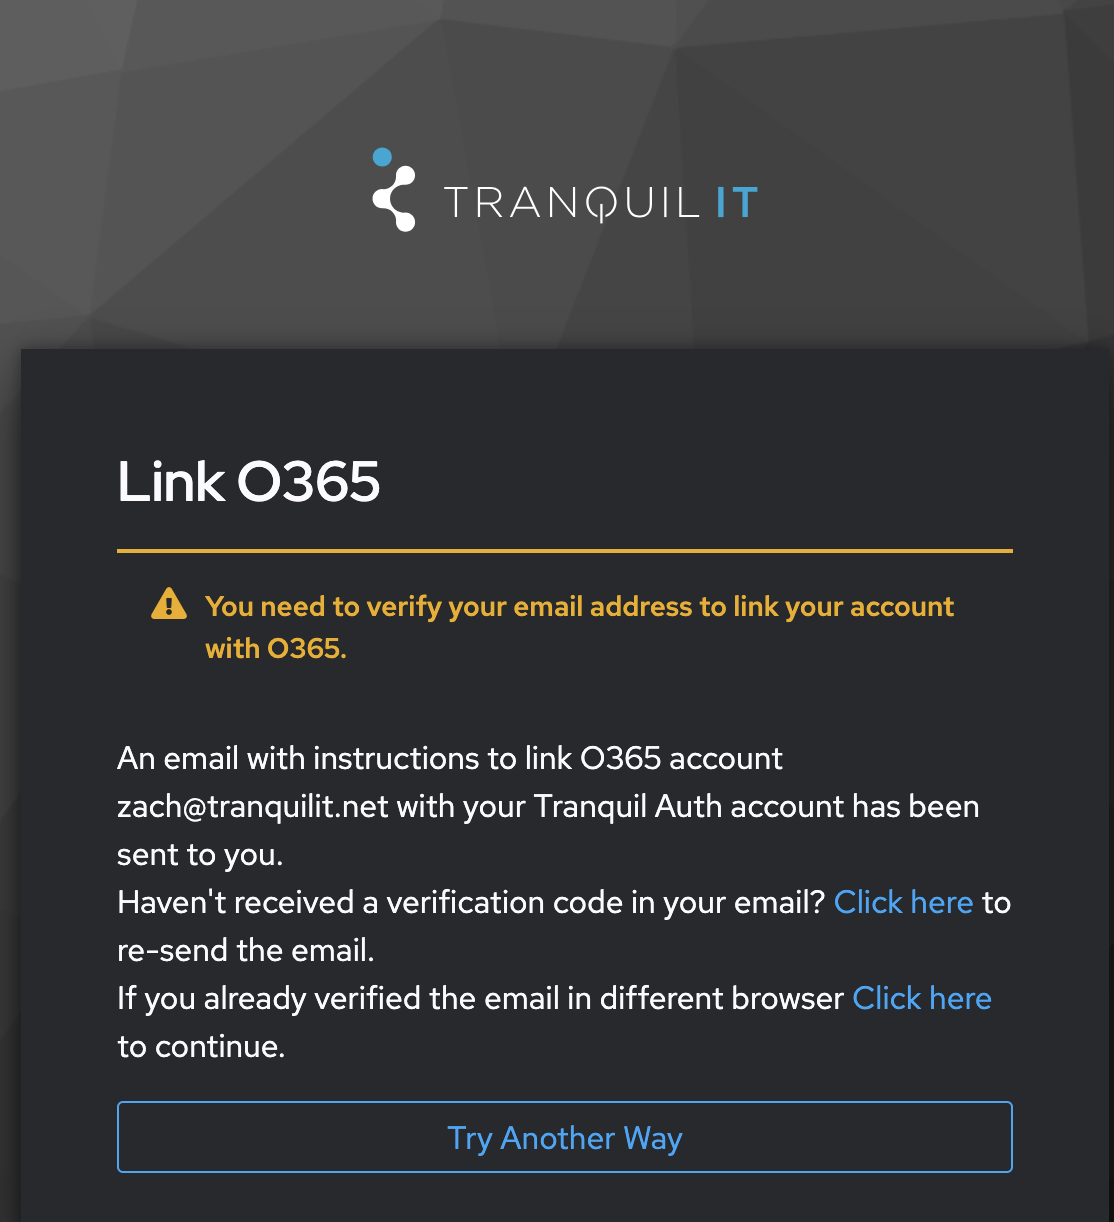
If you have previously used Tranquil SSO before, but not via your Microsoft Account, you may see this screen:

Select "Add to existing account", you will then be presented with another screen informing you of that you must first verify your email address.
You should now receive an e-mail like the below..
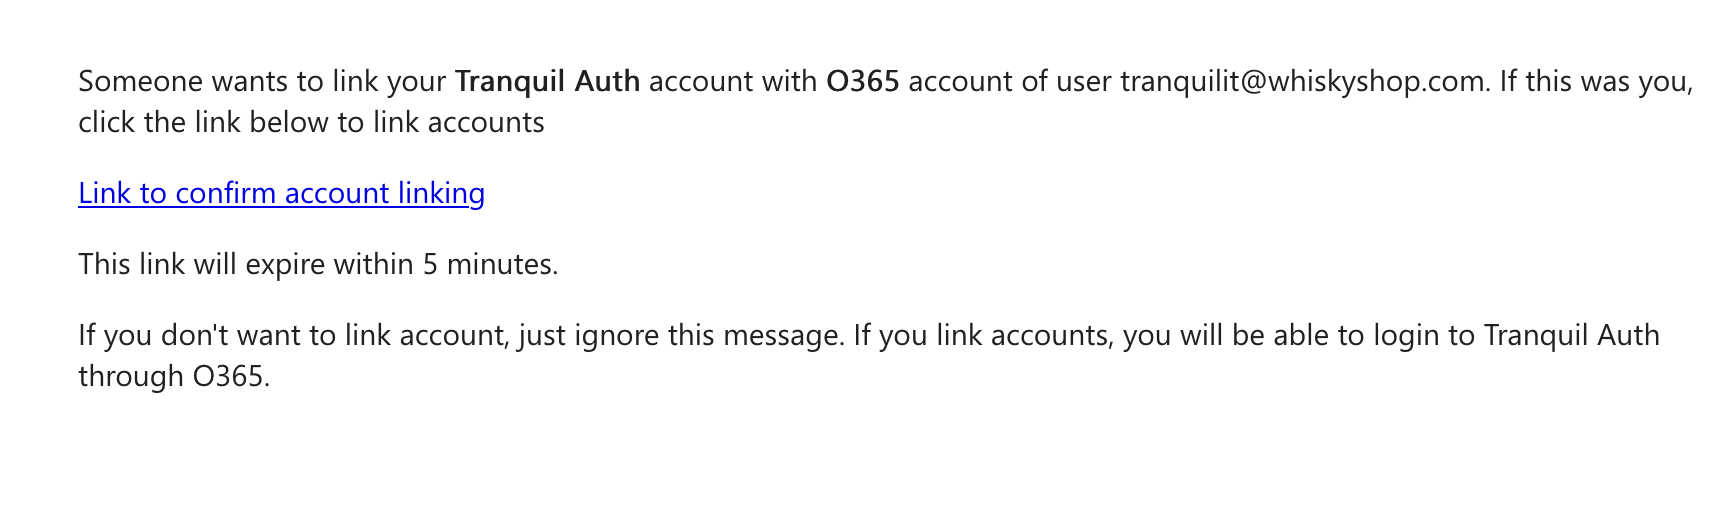
Once you have verified your email, you can now log into Tranquil SSO using your existing credentials from now on.
More help
You can get more help with signing in using the Tranquil SSO system in our Tranquil SSO documentation available here
The Client Area
First log on / setup
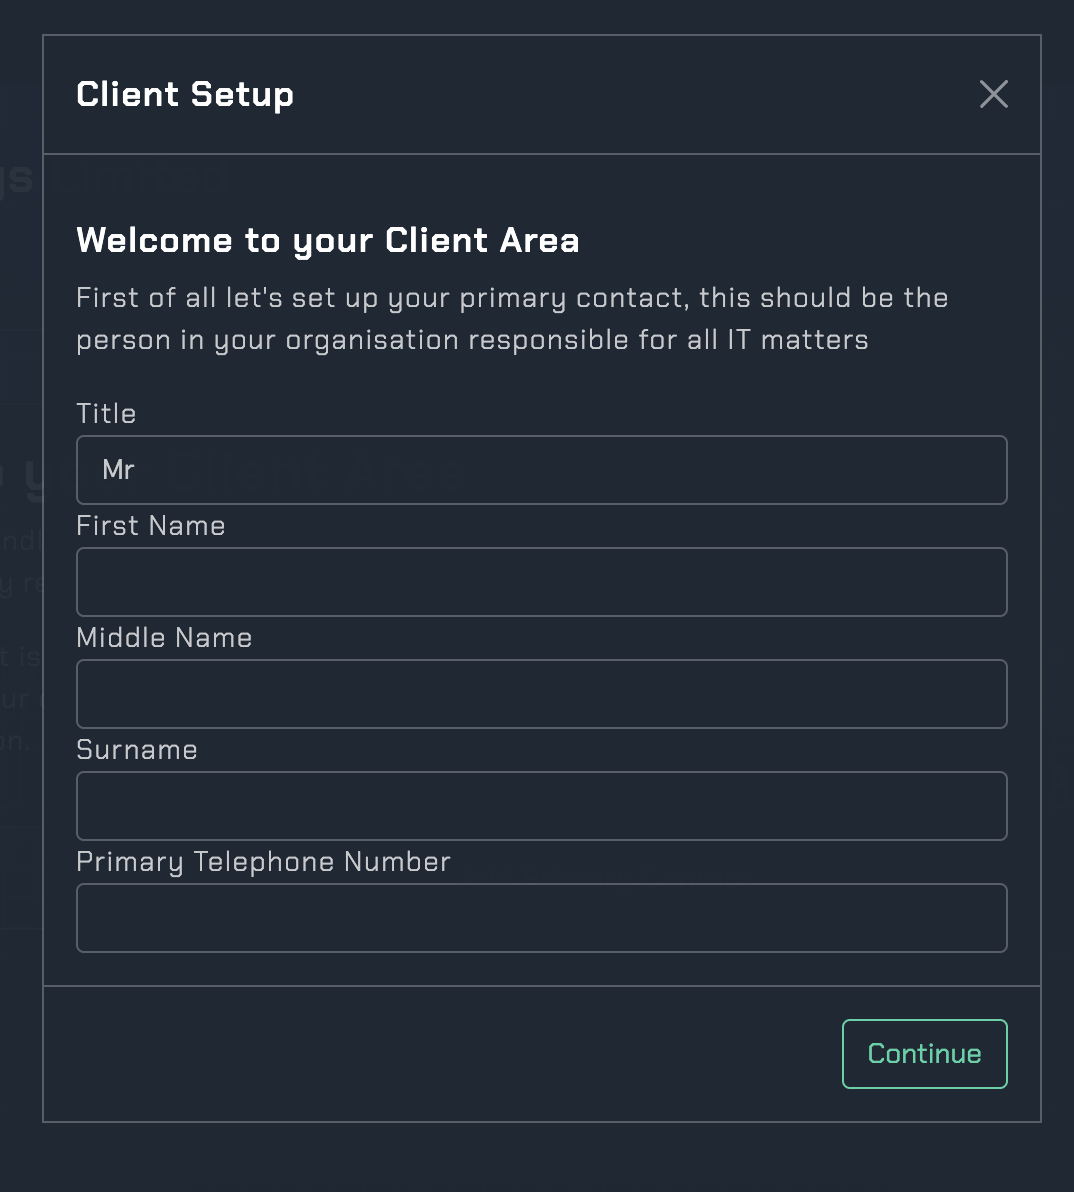
If this is the first time you are logging into your client area and you area a new customer to Tranquil IT then our AI system will prompt you to set up your Primary Contact.

Your Primary Contact, should be the person in your business responsible for local management of your IT or who makes the IT decisions for the business.
There are three roles in Sentinel with administrative permissions
Primary Contact:
The member of staff in your organisation who is responsible for decision making in IT
Accounts Contact:
The member of staff in your organisation whom is responsible for accounts and who has permissions to access financial reporting.
Owner / Managing Director:
The owner or managing director of the business, who has overall administrative permissions to the entire client area.
To start with you are going to set up the Primary Contact, click Add Primary Contact and complete the form that loads.
Layout overview
The home page in the client area is designed to show our customers at a glance the key issues which need their attention.
The client area is made up of two sections, the menu on the left hand side of the screen
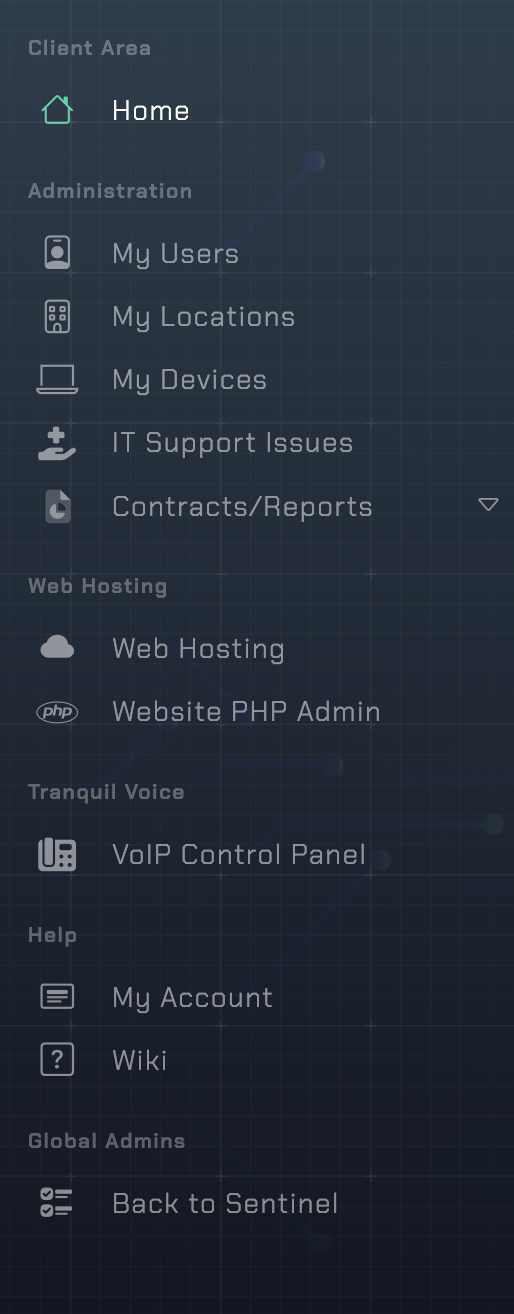
And the main display area
You can choose to show or hide the menu by clicking this button to the left of the Tranquil Logo.

You can change the look and feel of the client area by clicking this button to the right of the screen
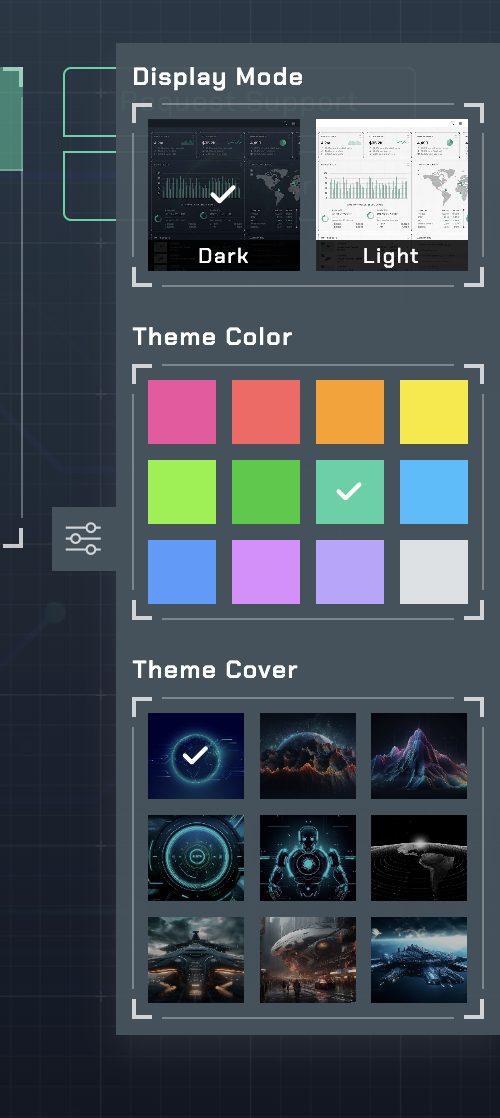
From here you can choose your display mode (either light or dark format) , the theme colour of your client area as well as a background cover of your choice from the 9 we have to select from.
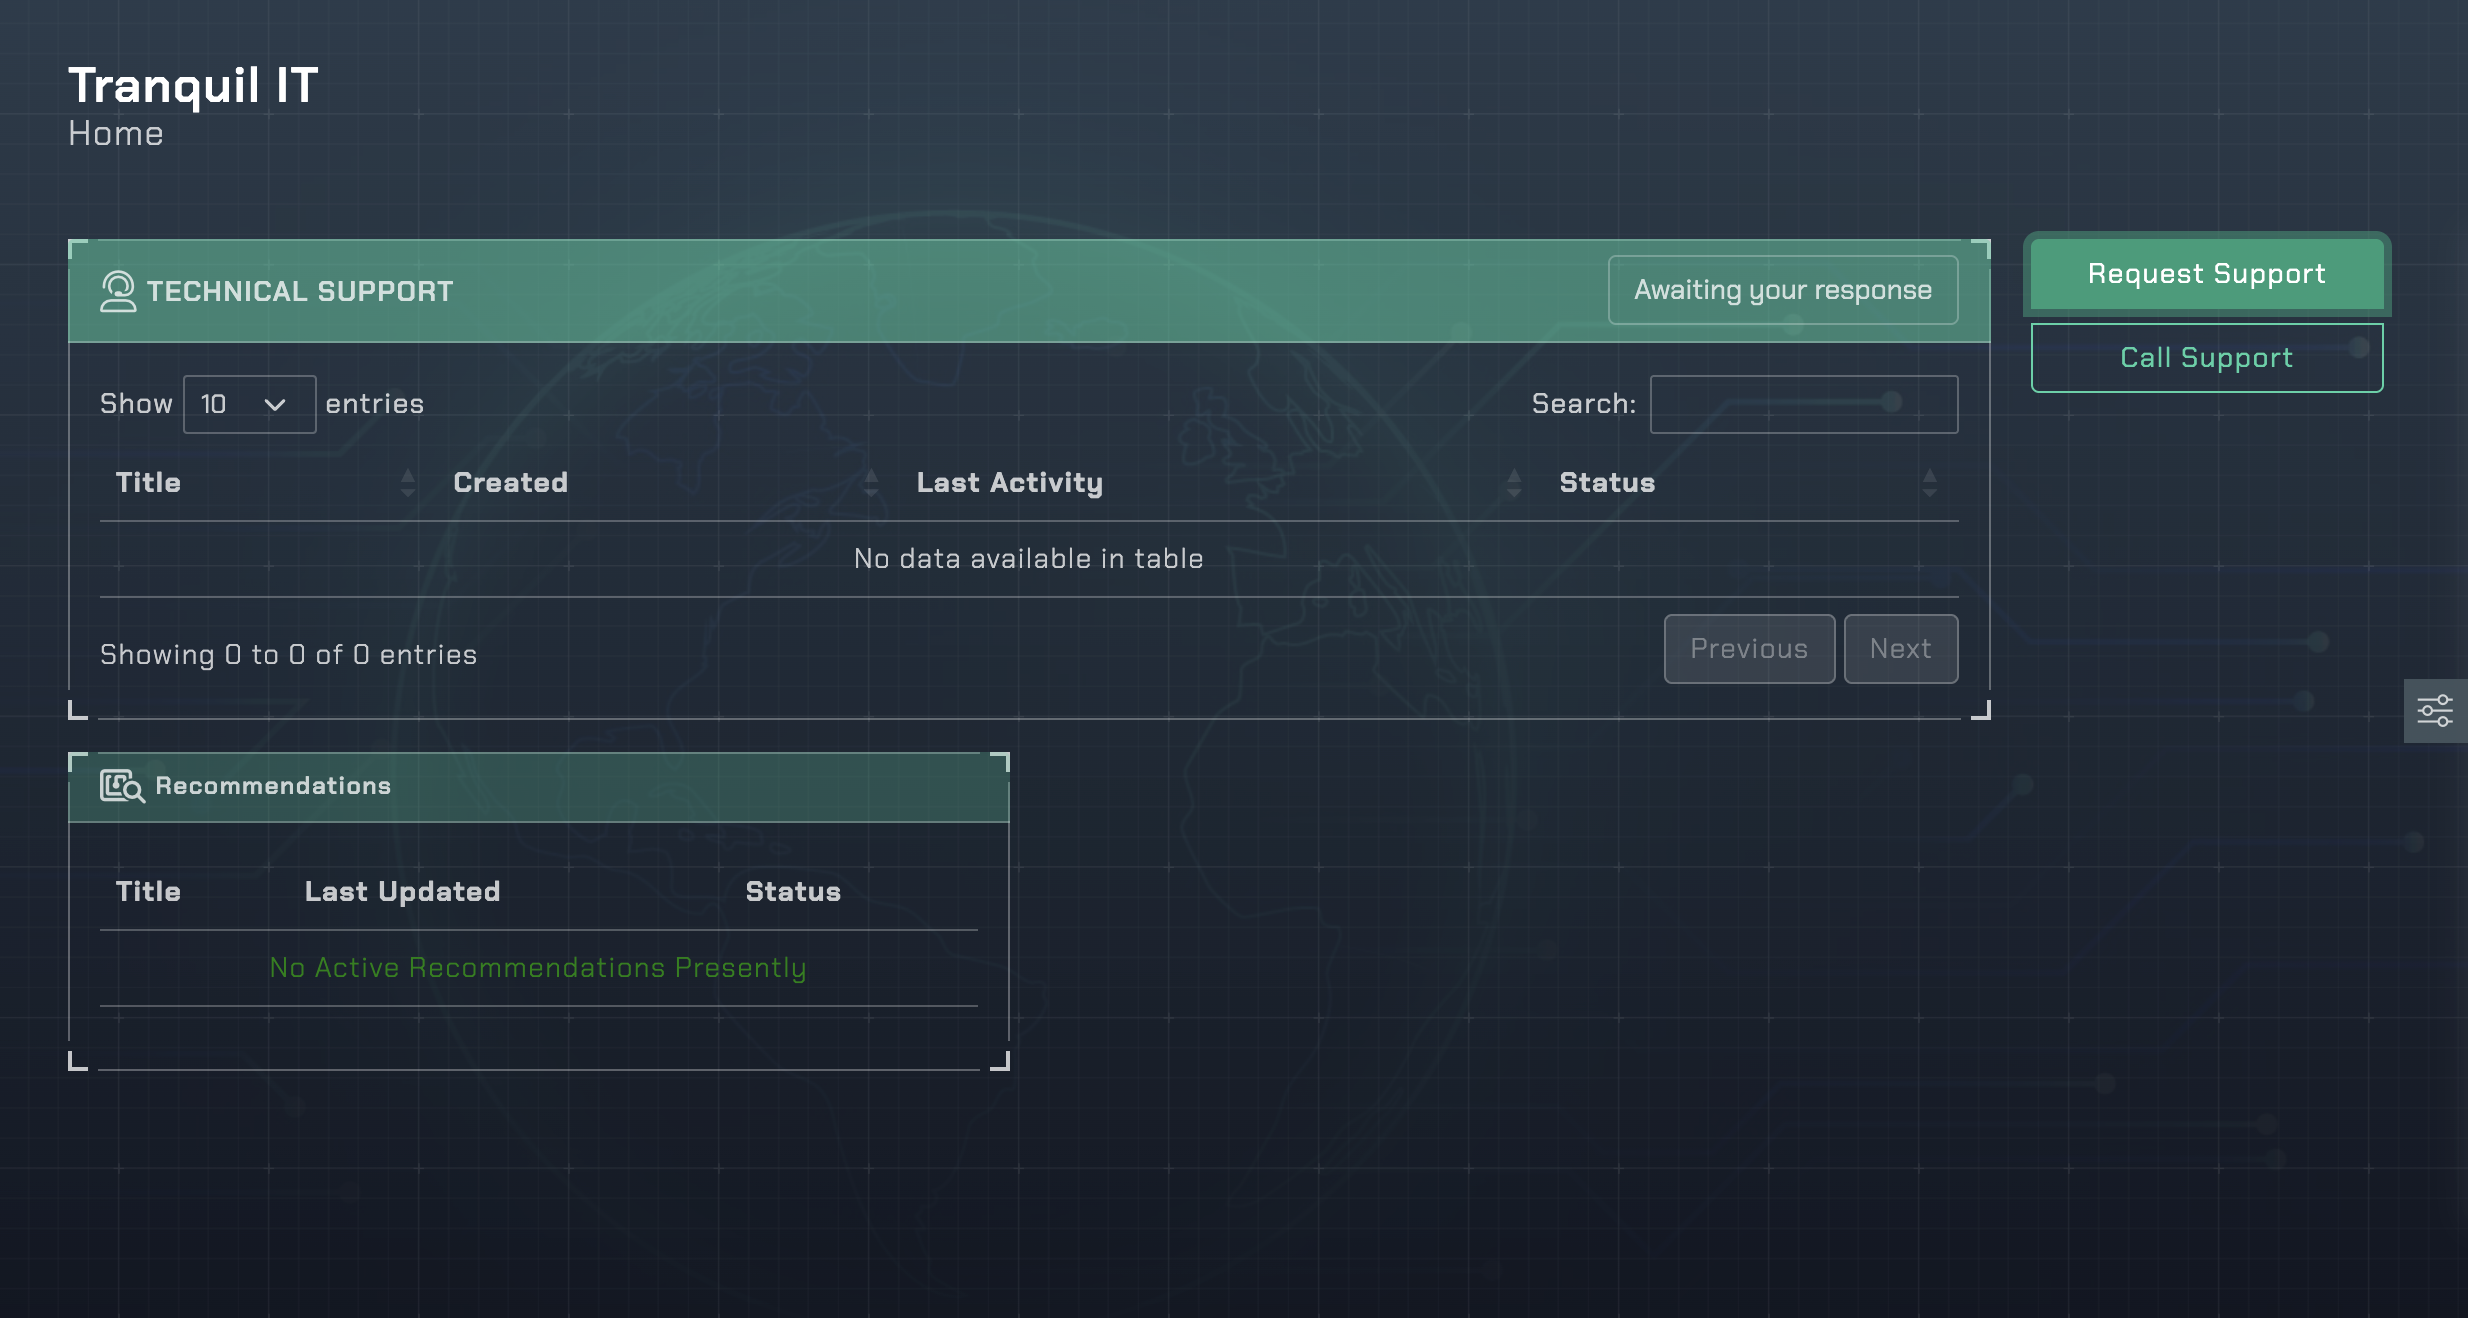
Home Page
The home page is designed to give our clients a quick overview of any matters that require their attention.
From here you can see any technical support issues that may be active, or require your input as well as any recommendations that have been made by our consultants that require your attention.
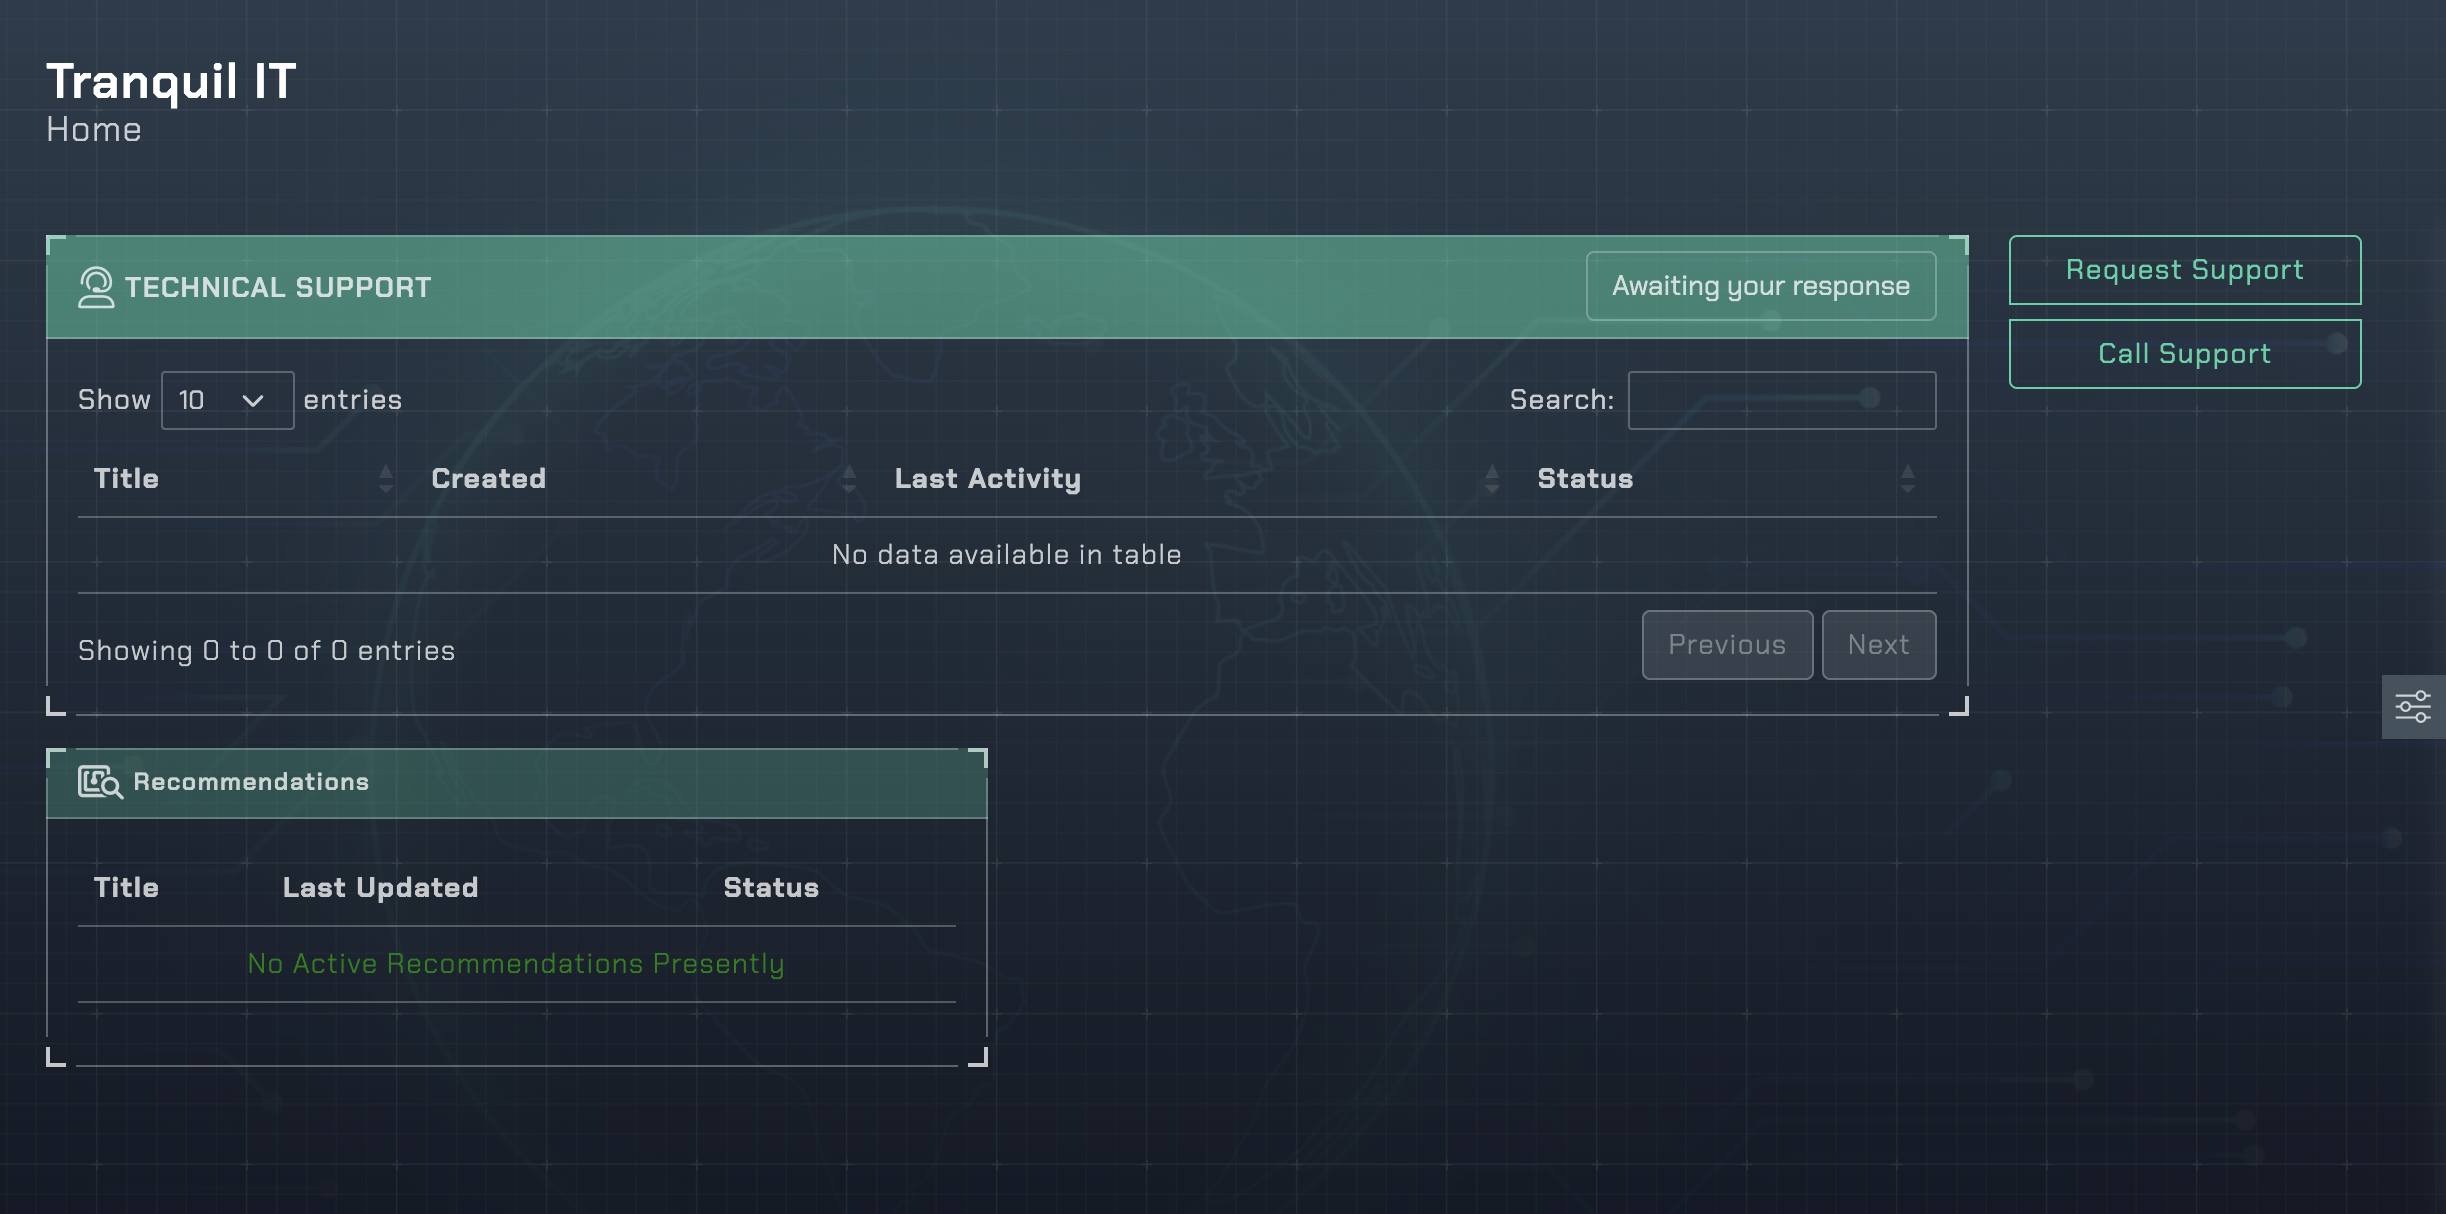
You can make a call to our help desk automatically from the client area by clicking call support.
If you want to raise a support ticket directly, you can do so from the Request Support button, which will open the menu below
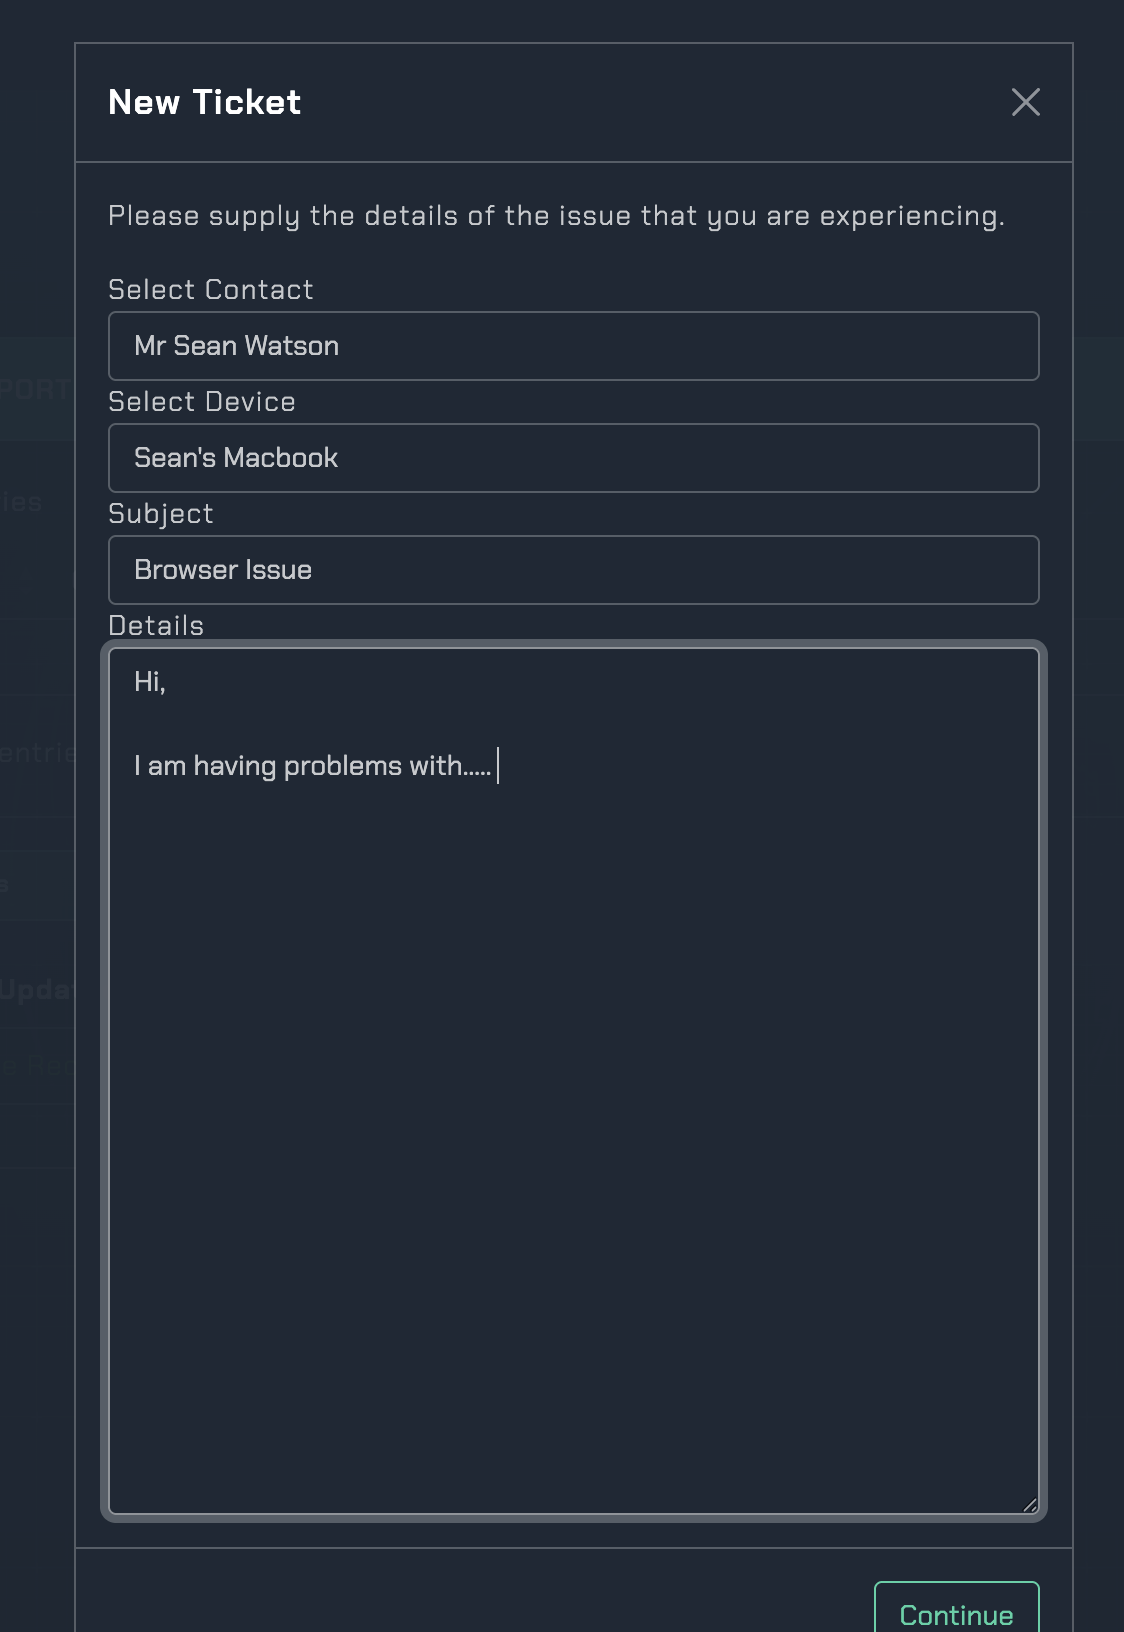
Simply fill in the provided form with details of the issue you are experiencing and a new ticket will be opened on the helpdesk, with the priority support level appropriate to the device that you have selected when raising the ticket.
Active Tickets
Any active tickets or tickets which require your attention will be shown in the Technical Support area of the home page as shown.
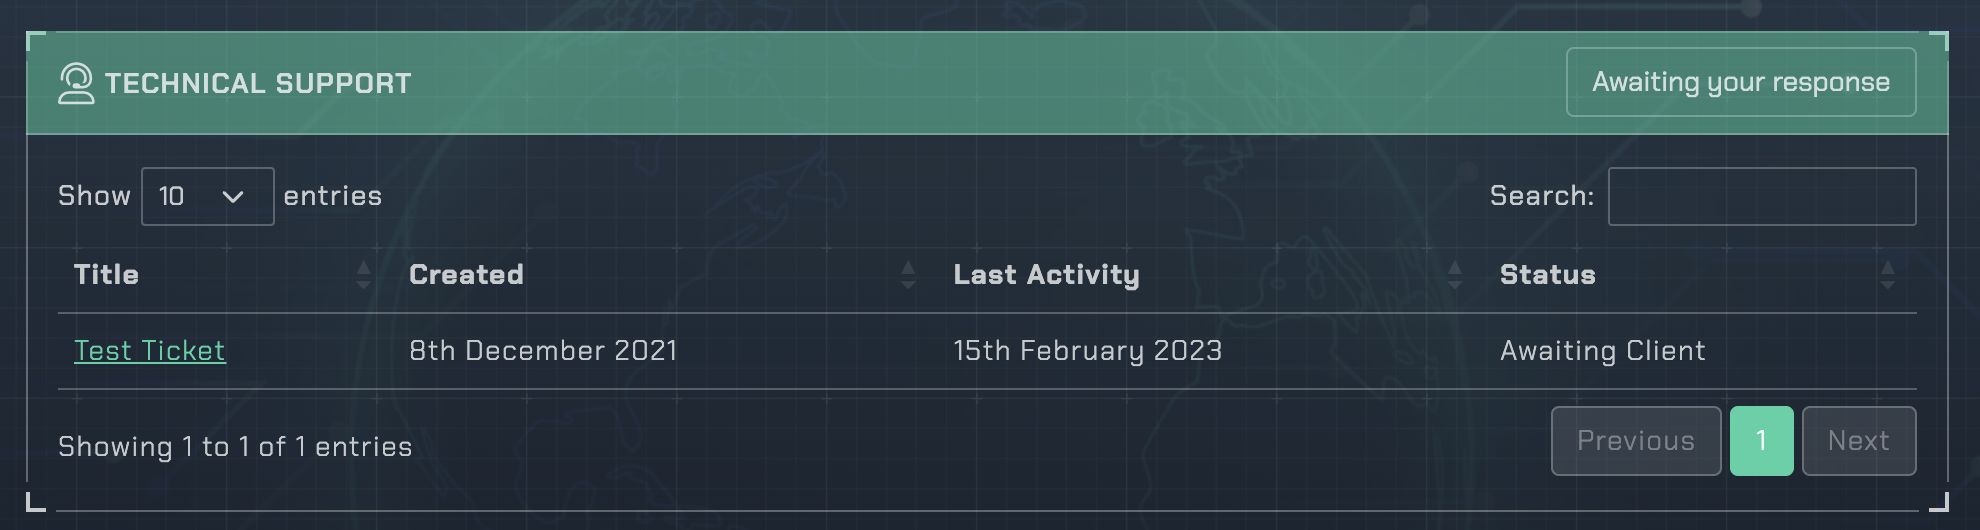
In order to interact with the ticket, simply click its title.
Ticket Details
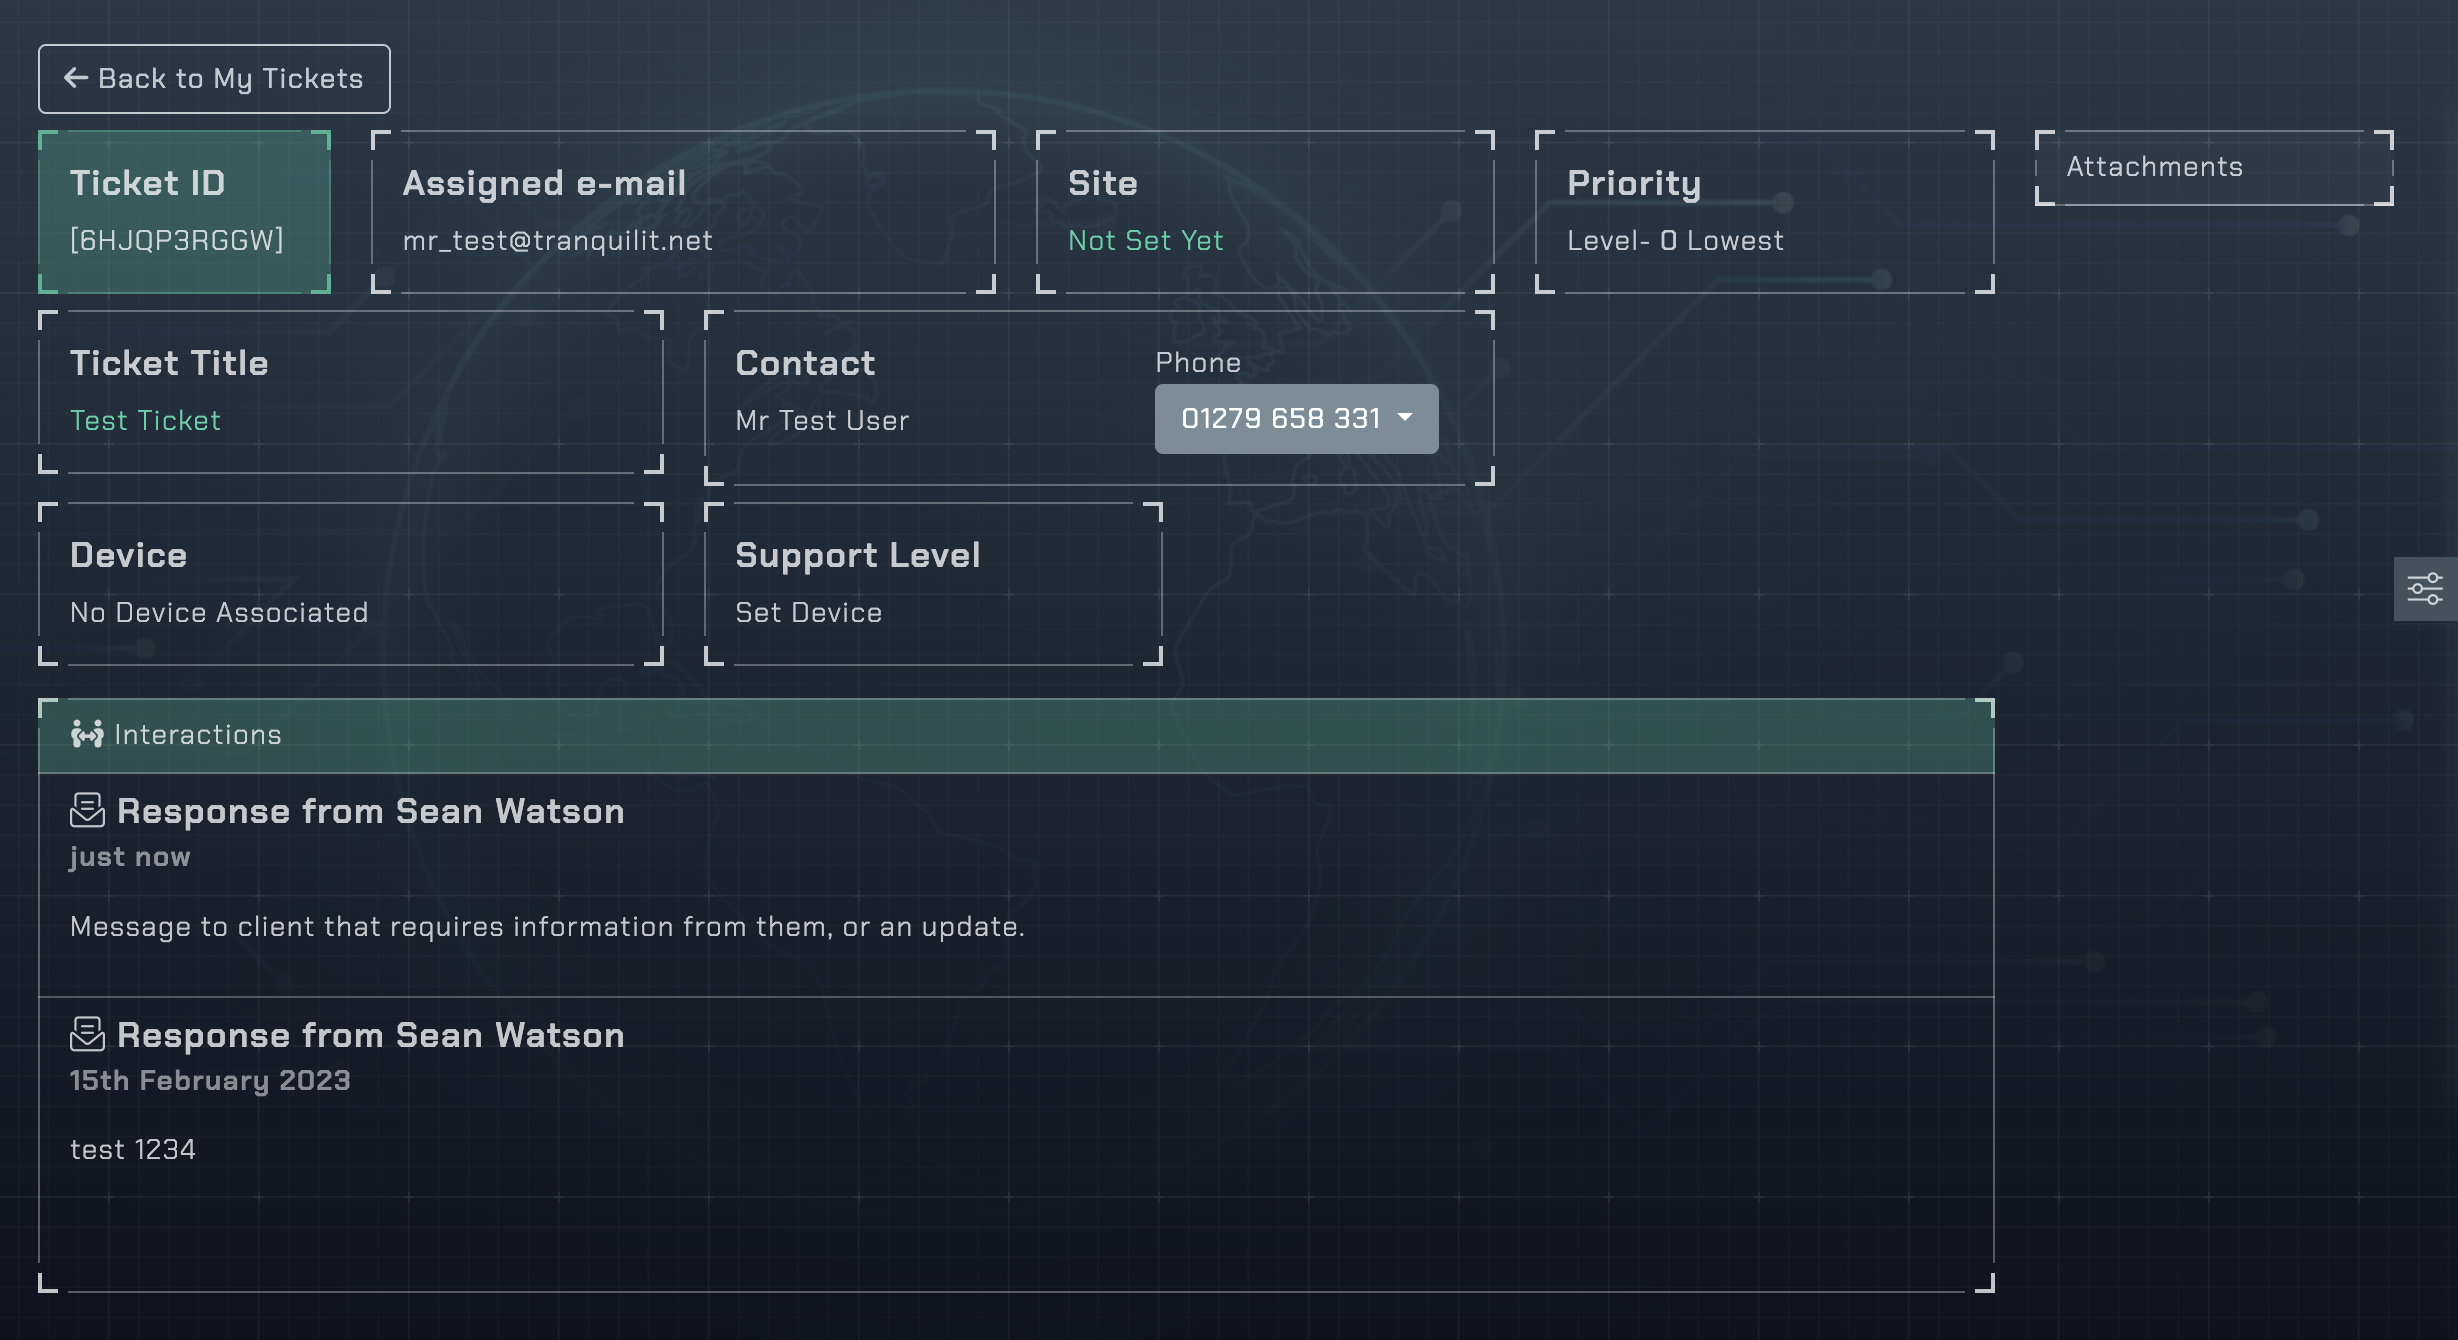
The ticket details screen will now open and show you the details of the support ticket you have selected.
Ticket ID
The Ticket ID should be used when contacting tranquil support if you need to make reference to this ticket, it is the fastest way for our our team to identify your issue, especially if you are a large company that often has many tickets open at any one time.
Assigned e-mail
This is the e-mail address of the person raising the issue and the main contact for the ticket.
Site
This is where you can set the location of the issue, if this is appropriate.
Priority
This shows the priority level that the Sentinel AI has assigned to your ticket on the basis of its initial triage. Often this Priority will be set to a default until the issue has been assessed by a member of our engineering team. This does not reflect the urgency of the particular issue, but rather the overall effect it is having on your entire IT infrastructure.
Do not worry if the Priority stays at 0, this often just means that one of our engineers is currently taking action on the ticket and it is no longer in a queue.
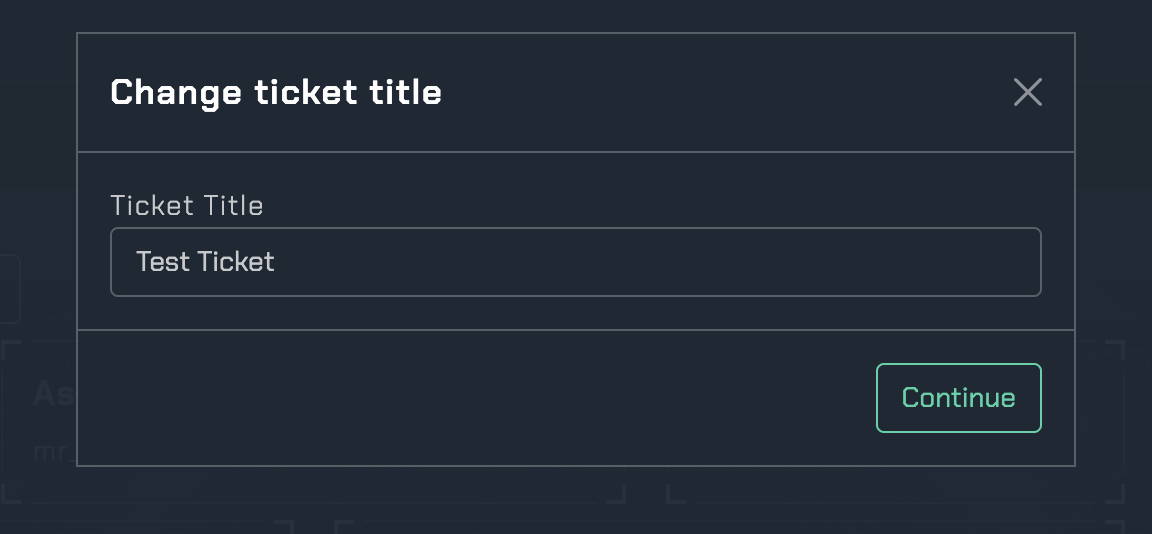
Ticket Title
The name of your ticket, often a brief description of the issue. You can change this easily by clicking on the title.
Contact
This section shows the member of staff that Tranquil IT will contact in order to resolve this ticket and the telephone details we hold by which to contact them.
Device
This shows the device to which this ticket is attached. It is important that the correct device is attached as this often controls the level of support that is provided. If for an example an unsupported device is selected it will always receive the lowest priority for attention, whereas a supported, or Premier supported device will receive the requisite SLA levels to which they subscribe.
Support Level
This shows the support level assigned to the device to which this ticket pertains.
Interactions
This section shows all interactions between the client and the Tranquil Support team.